
October 14, 2026
Maya Bellies: A Surprisingly Versatile Article
Conceria Il Ponte · Whisky · Maya Belly
I ordered Maya from THOL Fine Leathers with an uncertain project in mind and a fairly settled idea of what a belly could do. I imagined using it as a decorative panel, or perhaps integrating it into a bag whose strength and structure would be supplied by something else. I expected it to stretch like summer taffy. It barely moved.
What arrived was a substantial piece of leather with a compact temper and a surface whose beauty shifted with a turn of the hand. It was gorgeous, but in fits. Over the following 36 hours, I tested five treatments and made a belt and a kitchen-knife sheath, revising my plans as I worked. My conclusion: This is a special, highly affordable article with extraordinary potential.
- Reviewed
- Maya Belly · Whisky by Conceria Il Ponte
- Reviewed by
- Basil Cleveland
1. Size and Temper
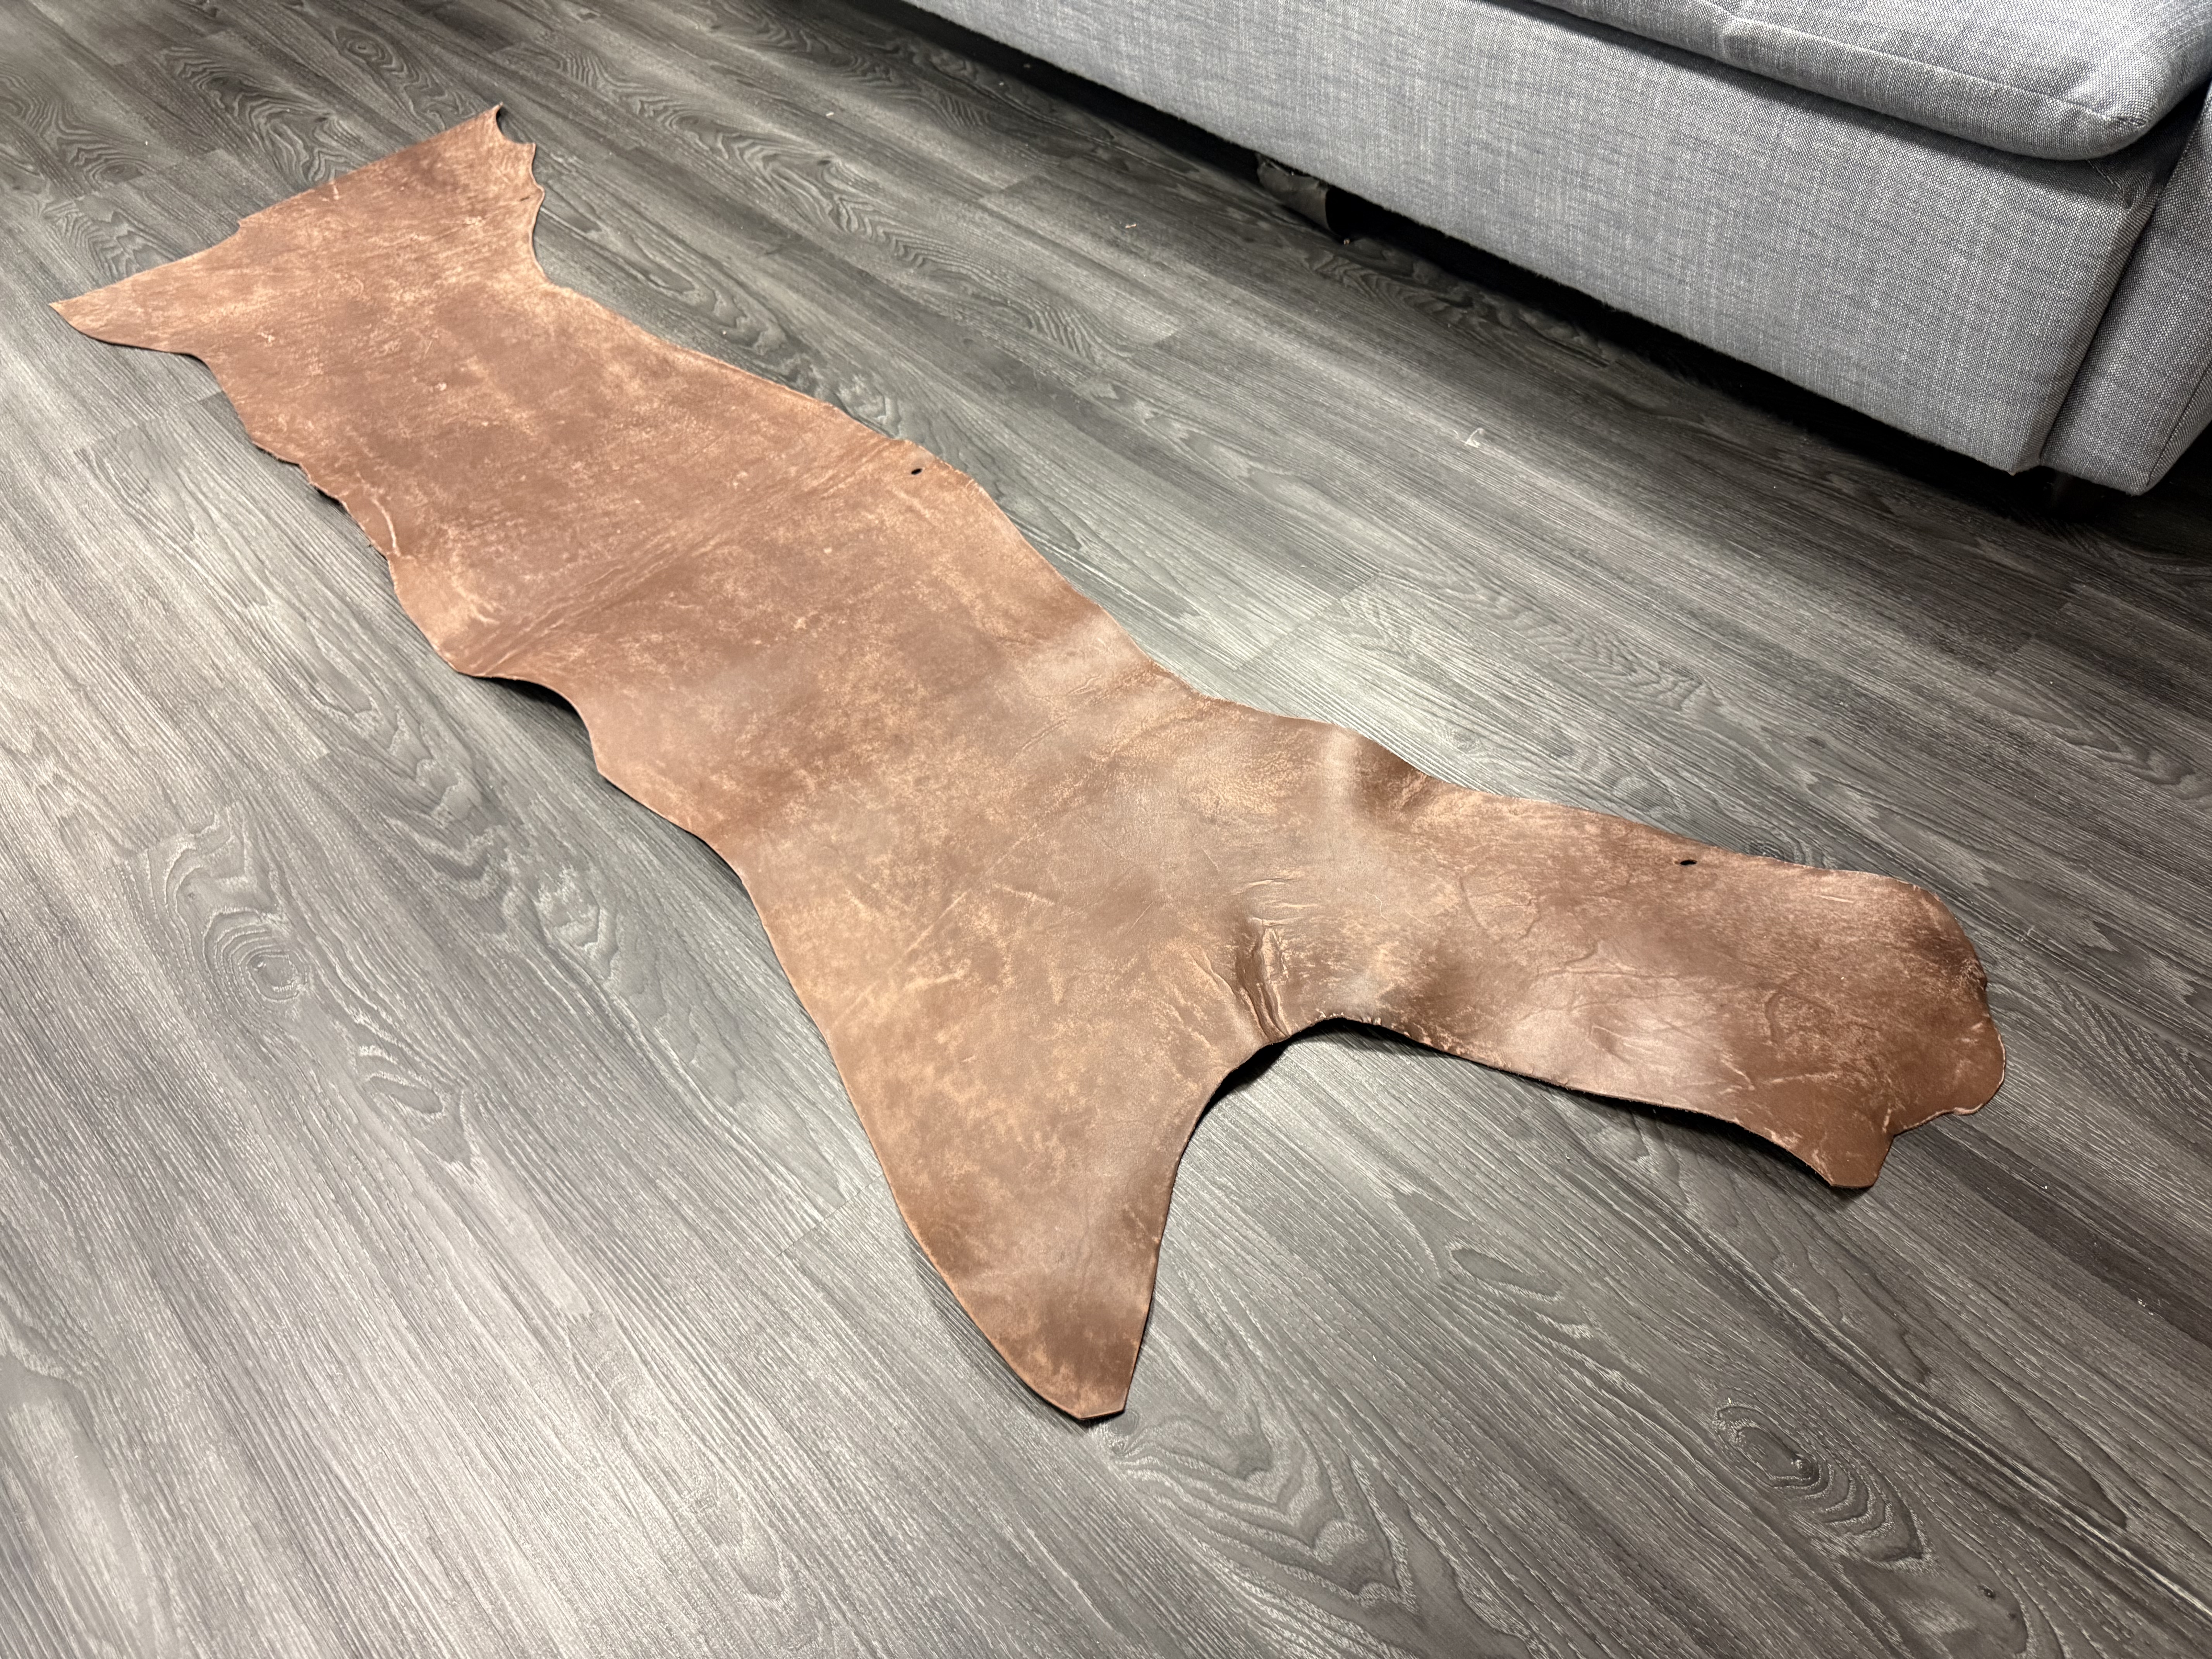
This belly occupied considerably more floor than I had anticipated. It was 75 inches long, averaging 15 inches wide, with the width ranging from 12 to 20 inches. It offered enough continuous length for a 48-inch belt. More on that below. The next question was whether it would stretch as freely as the bellies I’d used before. I tested it with my hands. Nothing, no movement. I then secured it in a vise and pulled with both hands. Along the substantial length of the piece, it scarcely budged. Some of the deeply wrinkled areas had a little give, but most of it was impressively inelastic.
Its thickness was pleasantly uniform. My gauge registered between 1.4 and 1.6 mm, averaging about 1.5 mm. I would describe the temper as medium-firm: compact, with little of the springy resistance I associate with, say, Chromexcel.
Usable Area
I began with a proper trim, removing the areas I would never put into finished work: deeply set wrinkles, unacceptable scars, loose grain, and sections whose temper was too uneven. About 70% remained after that first pass. Then I considered geometry. A sound piece shaped like a 'U' has little practical value if none of my projects calls for that shape. After accounting for those losses, I estimated that roughly half the original piece was highly usable. These were estimates based on what I could actually cut and use. This is a strong outcome for a belly, in my experience.
The distinction between soft grain and loose grain matters here. By soft grain I mean a local difference in density, a little movement under the fingers; loose grain feels as though the surface is floating over the flesh beneath it. I removed all the loose grain. Some softness remained near the center of a panel, where it caused no difficulty (though the same softness at a finished edge would have required more care). The pieces I kept also carried scars and insect marks in an amount I would associate with a belly or a horse rump. I was comfortable retaining them. I liked the way the Whisky finish worked with those marks.
2. Surface and Light
Maya initially called to mind Badalassi Carlo Pueblo, whose abraded appearance stays remarkably consistent across a double shoulder. Pueblo's slight nap also lends the surface a delicate softness. Maya’s apparent abrasion was much less regular. Small circular marks suggested machine abrasion, interspersed with scars and other traces of the animal's actual life. Patterns (bites, creases, abrasions, uneven dye patches) gathered and dispersed like arctic weather. I found it beautiful, and still do.
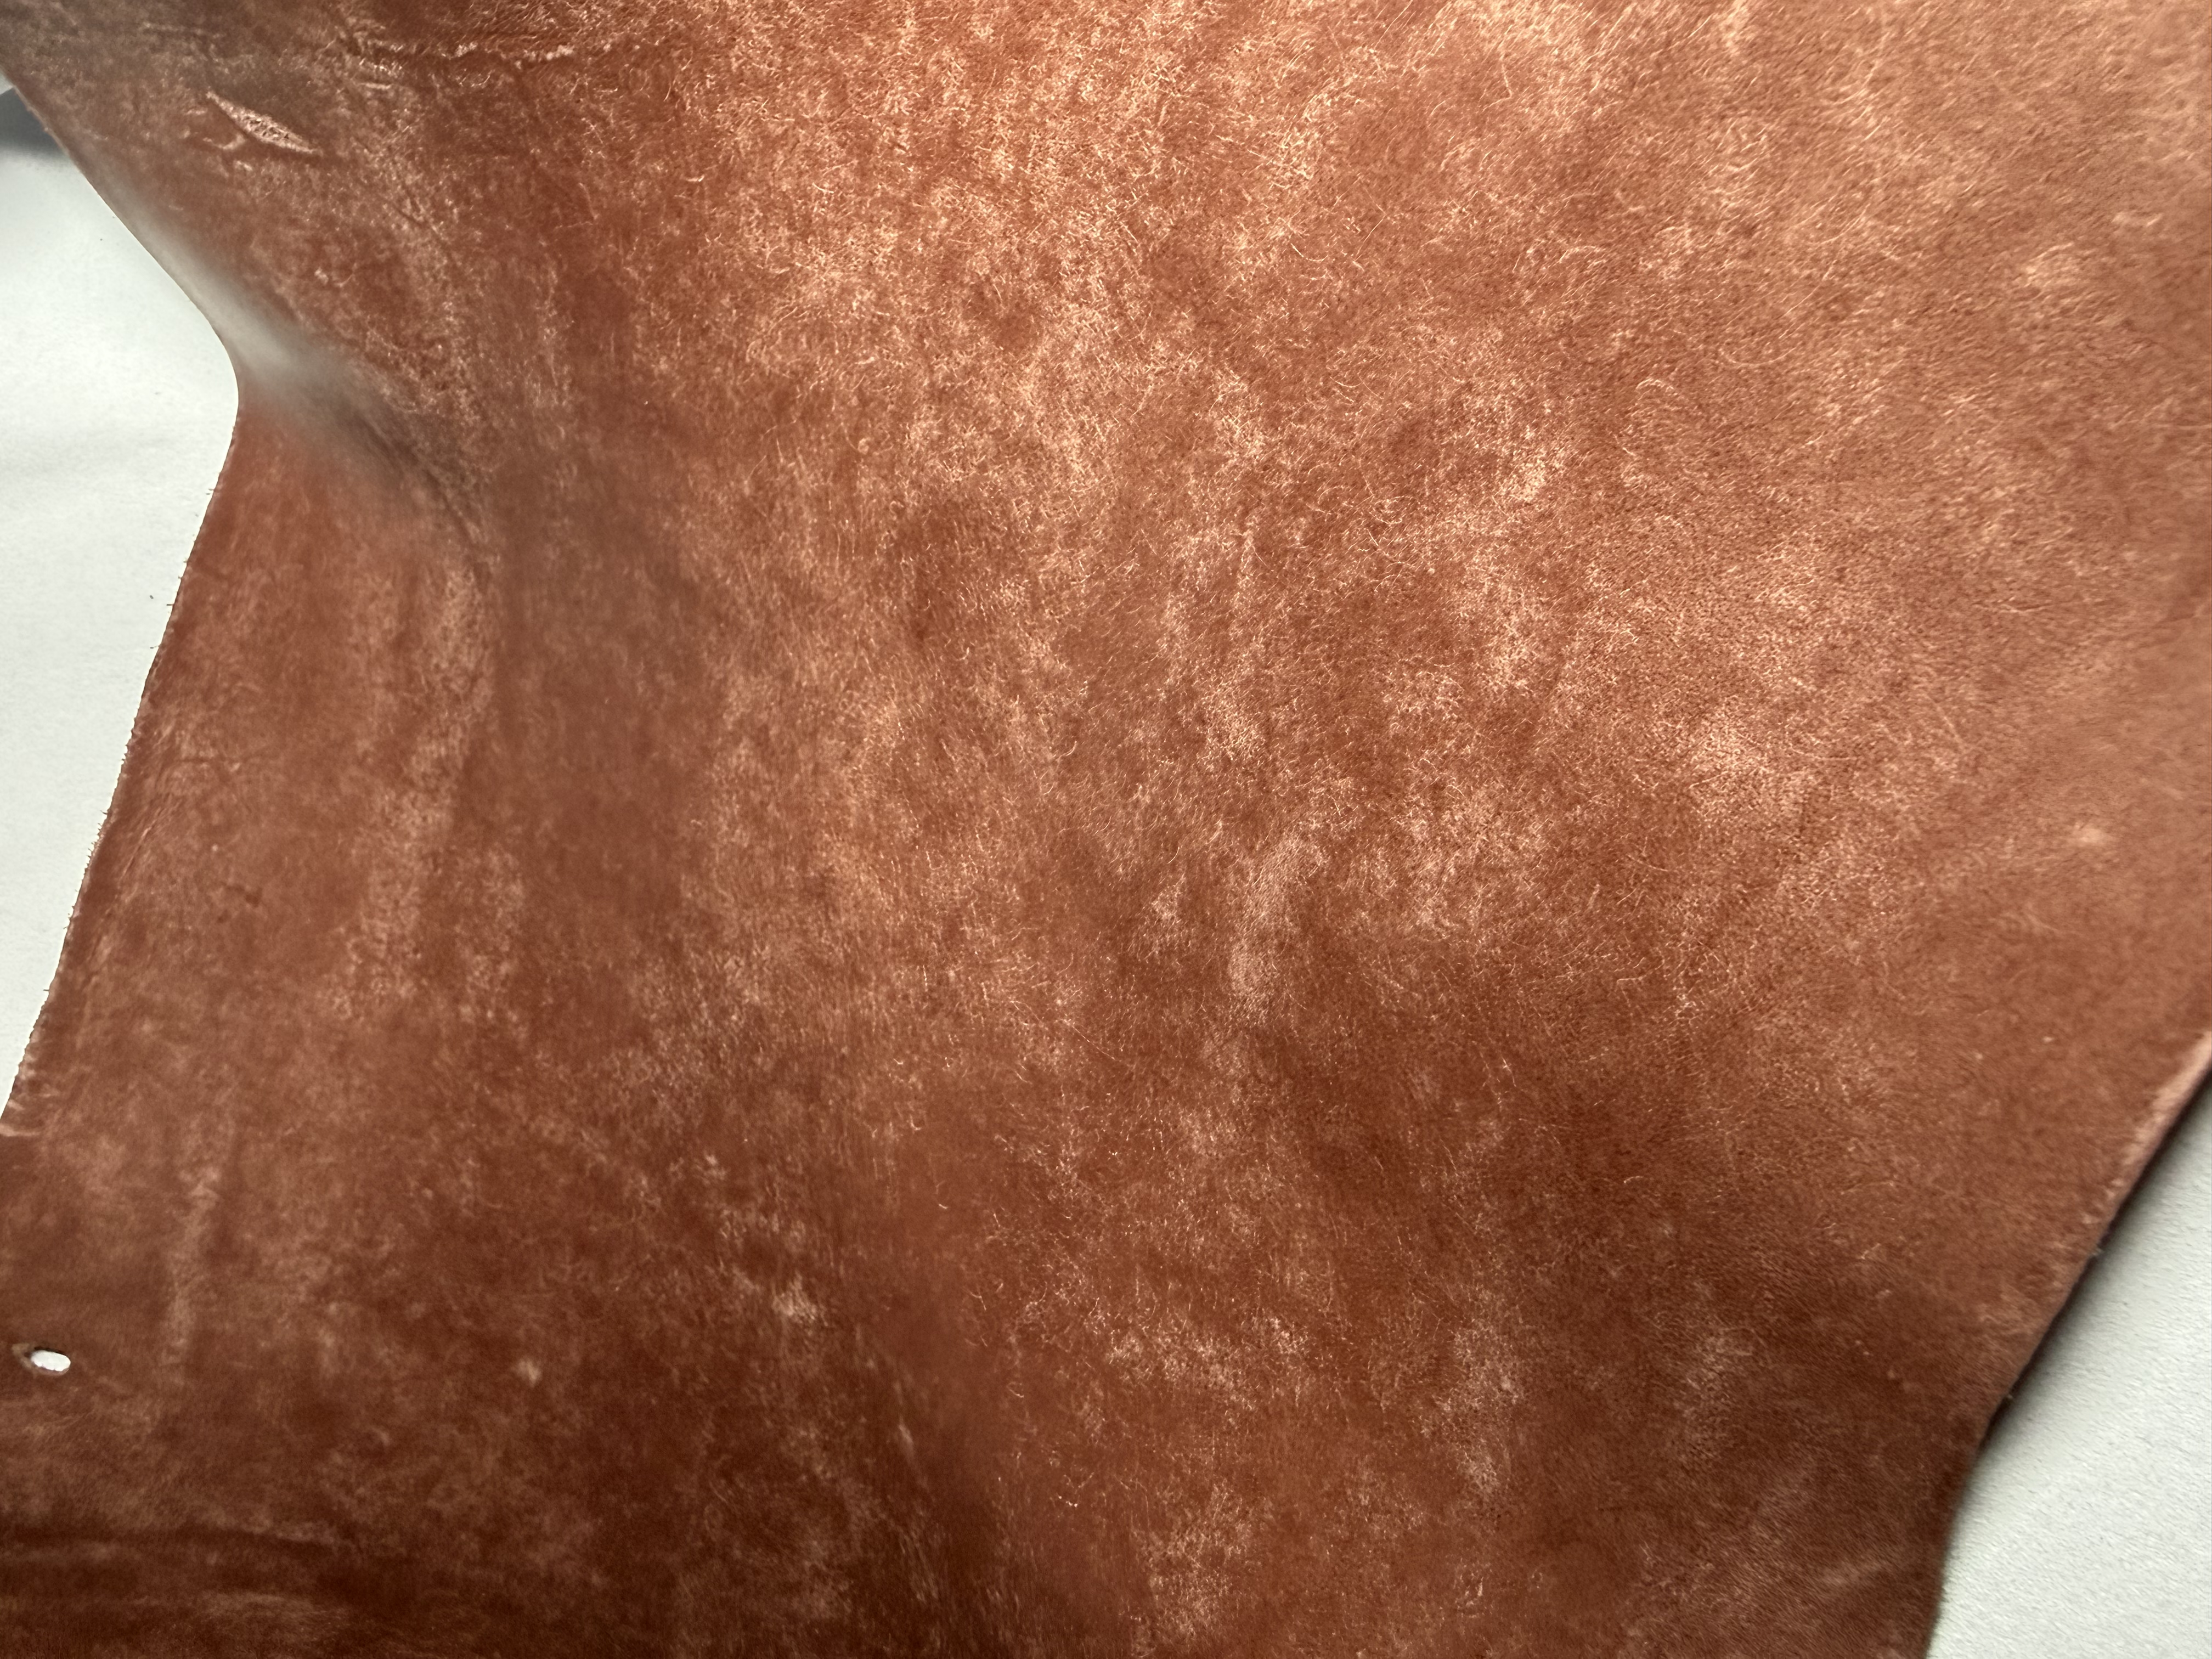
I expected to encounter small elevations as I moved my fingers between patches. Within a working area, however, the leather was mostly smooth; I had to span perhaps two feet to feel changes in surface character. Maya's wild topography was largely optical. My camera, too, struggled to resolve the mottling and fuzz-runs. I included the edges in several of the photos partly to give it something definite on which to focus. The dry appearance reminded me of rawhide, though its reddish warmth was closer to whisky (or cedar, depending on the light source).
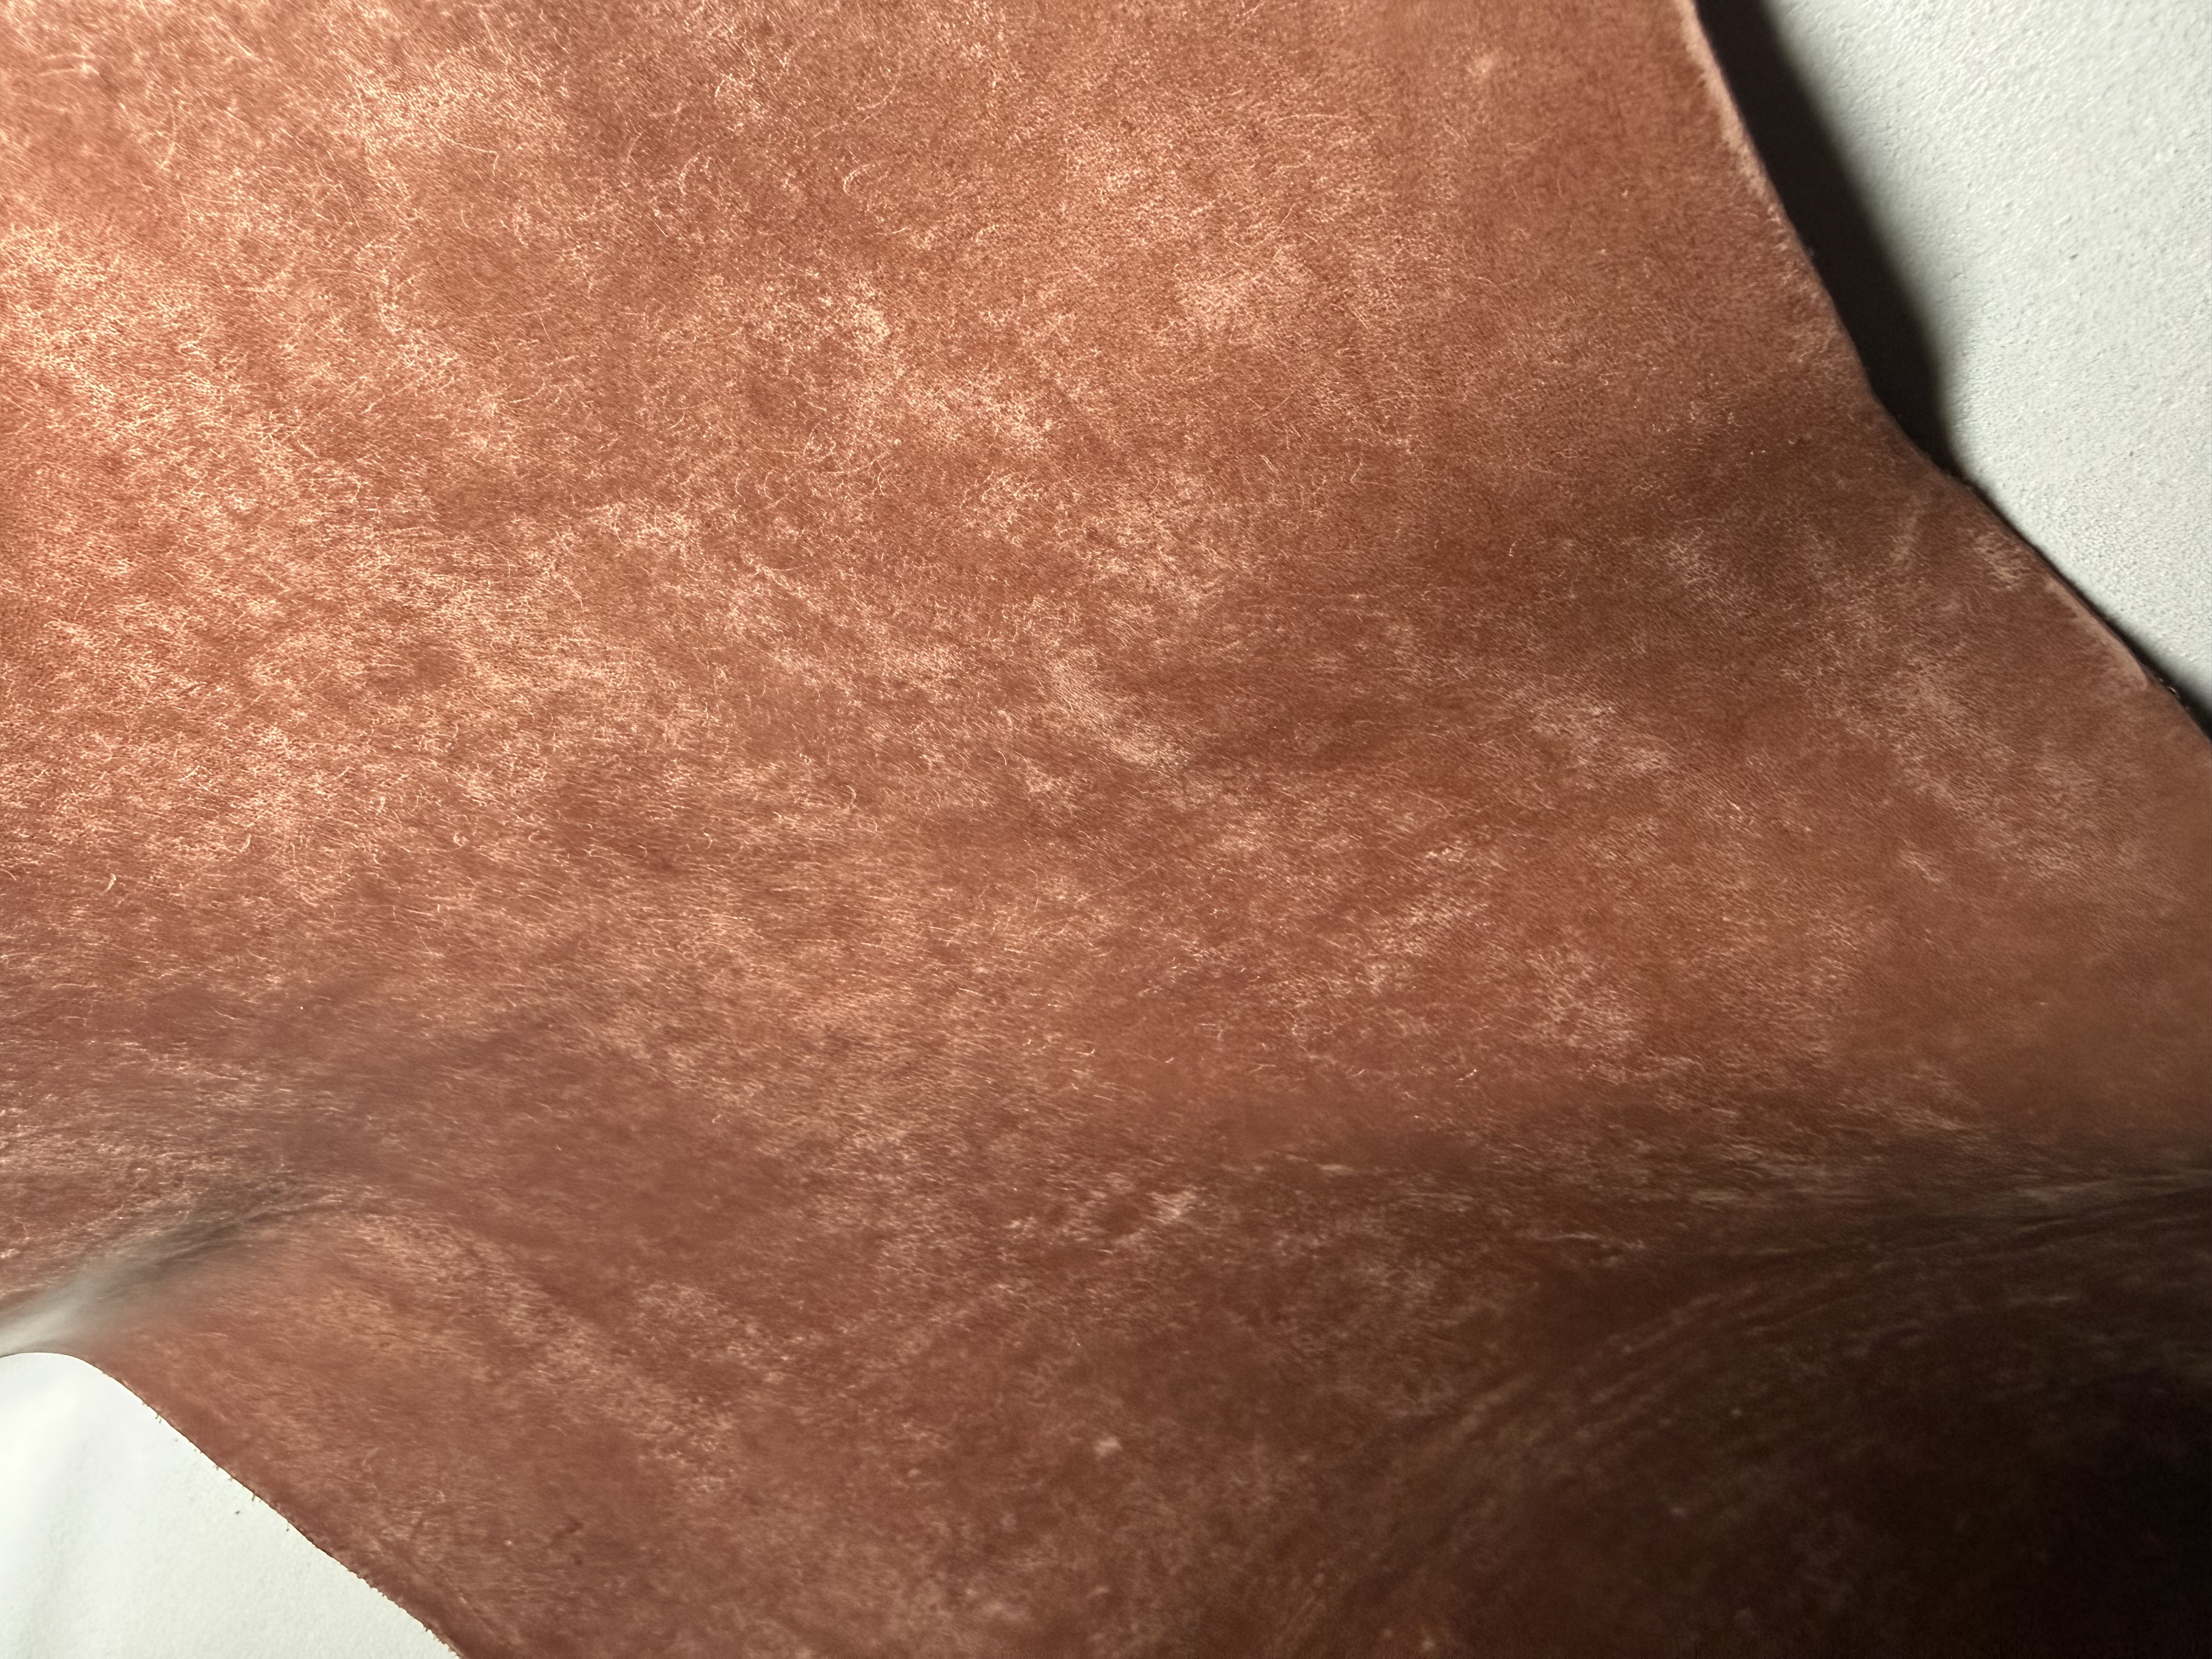
Different light sources produced different effects. I tried the room’s neutral LEDs, then my phone light and a lamp, eventually taking the leather outside because I could not pin down its color. Even under a single light, a change of angle could make it much darker or paler. At the right angle, pinpricks appeared within the abraded patches and rivers of color passed through them, producing a pillowy, blooming depth. A slight turn, and I was looking at defective rawhide.
I gently bent the leather under raking light. Maya showed considerable detail this way, though a harder fold produced a less attractive result. There was a slight lightening that largely remained after I unfolded and warmed it. It looked damaged (it wasn't). I had hoped for the reversible color movement I associate with pull-up leather, but the lighter marks stayed. Its bending suggested a dry leaf more than a green one, although in practice I could bend it easily and return it by hand.
Matching panels was another problem. Two large rectangles cut from the same hide might appear to be cousins, but not sisters. For the large handbags I currently favor, there was too little matching area. But I could easily imagine making cardholders, passport covers, and large padfolios using Maya. Another maker might find a way to use the whole belly in a larger composition.
3. Treatment Comparison
I kept one usable panel untreated (for reference) and divided another into five bands. Each band received a different conditioner/treatment. For the first band, I applied a touch of paraffin, working it in with the palm of my hand. When a dressing combines oils and waxes, it can be difficult to distinguish their contributions, and I wanted to feel what wax alone would do.
The other treatments (see the table below) were applied with a linen cloth.
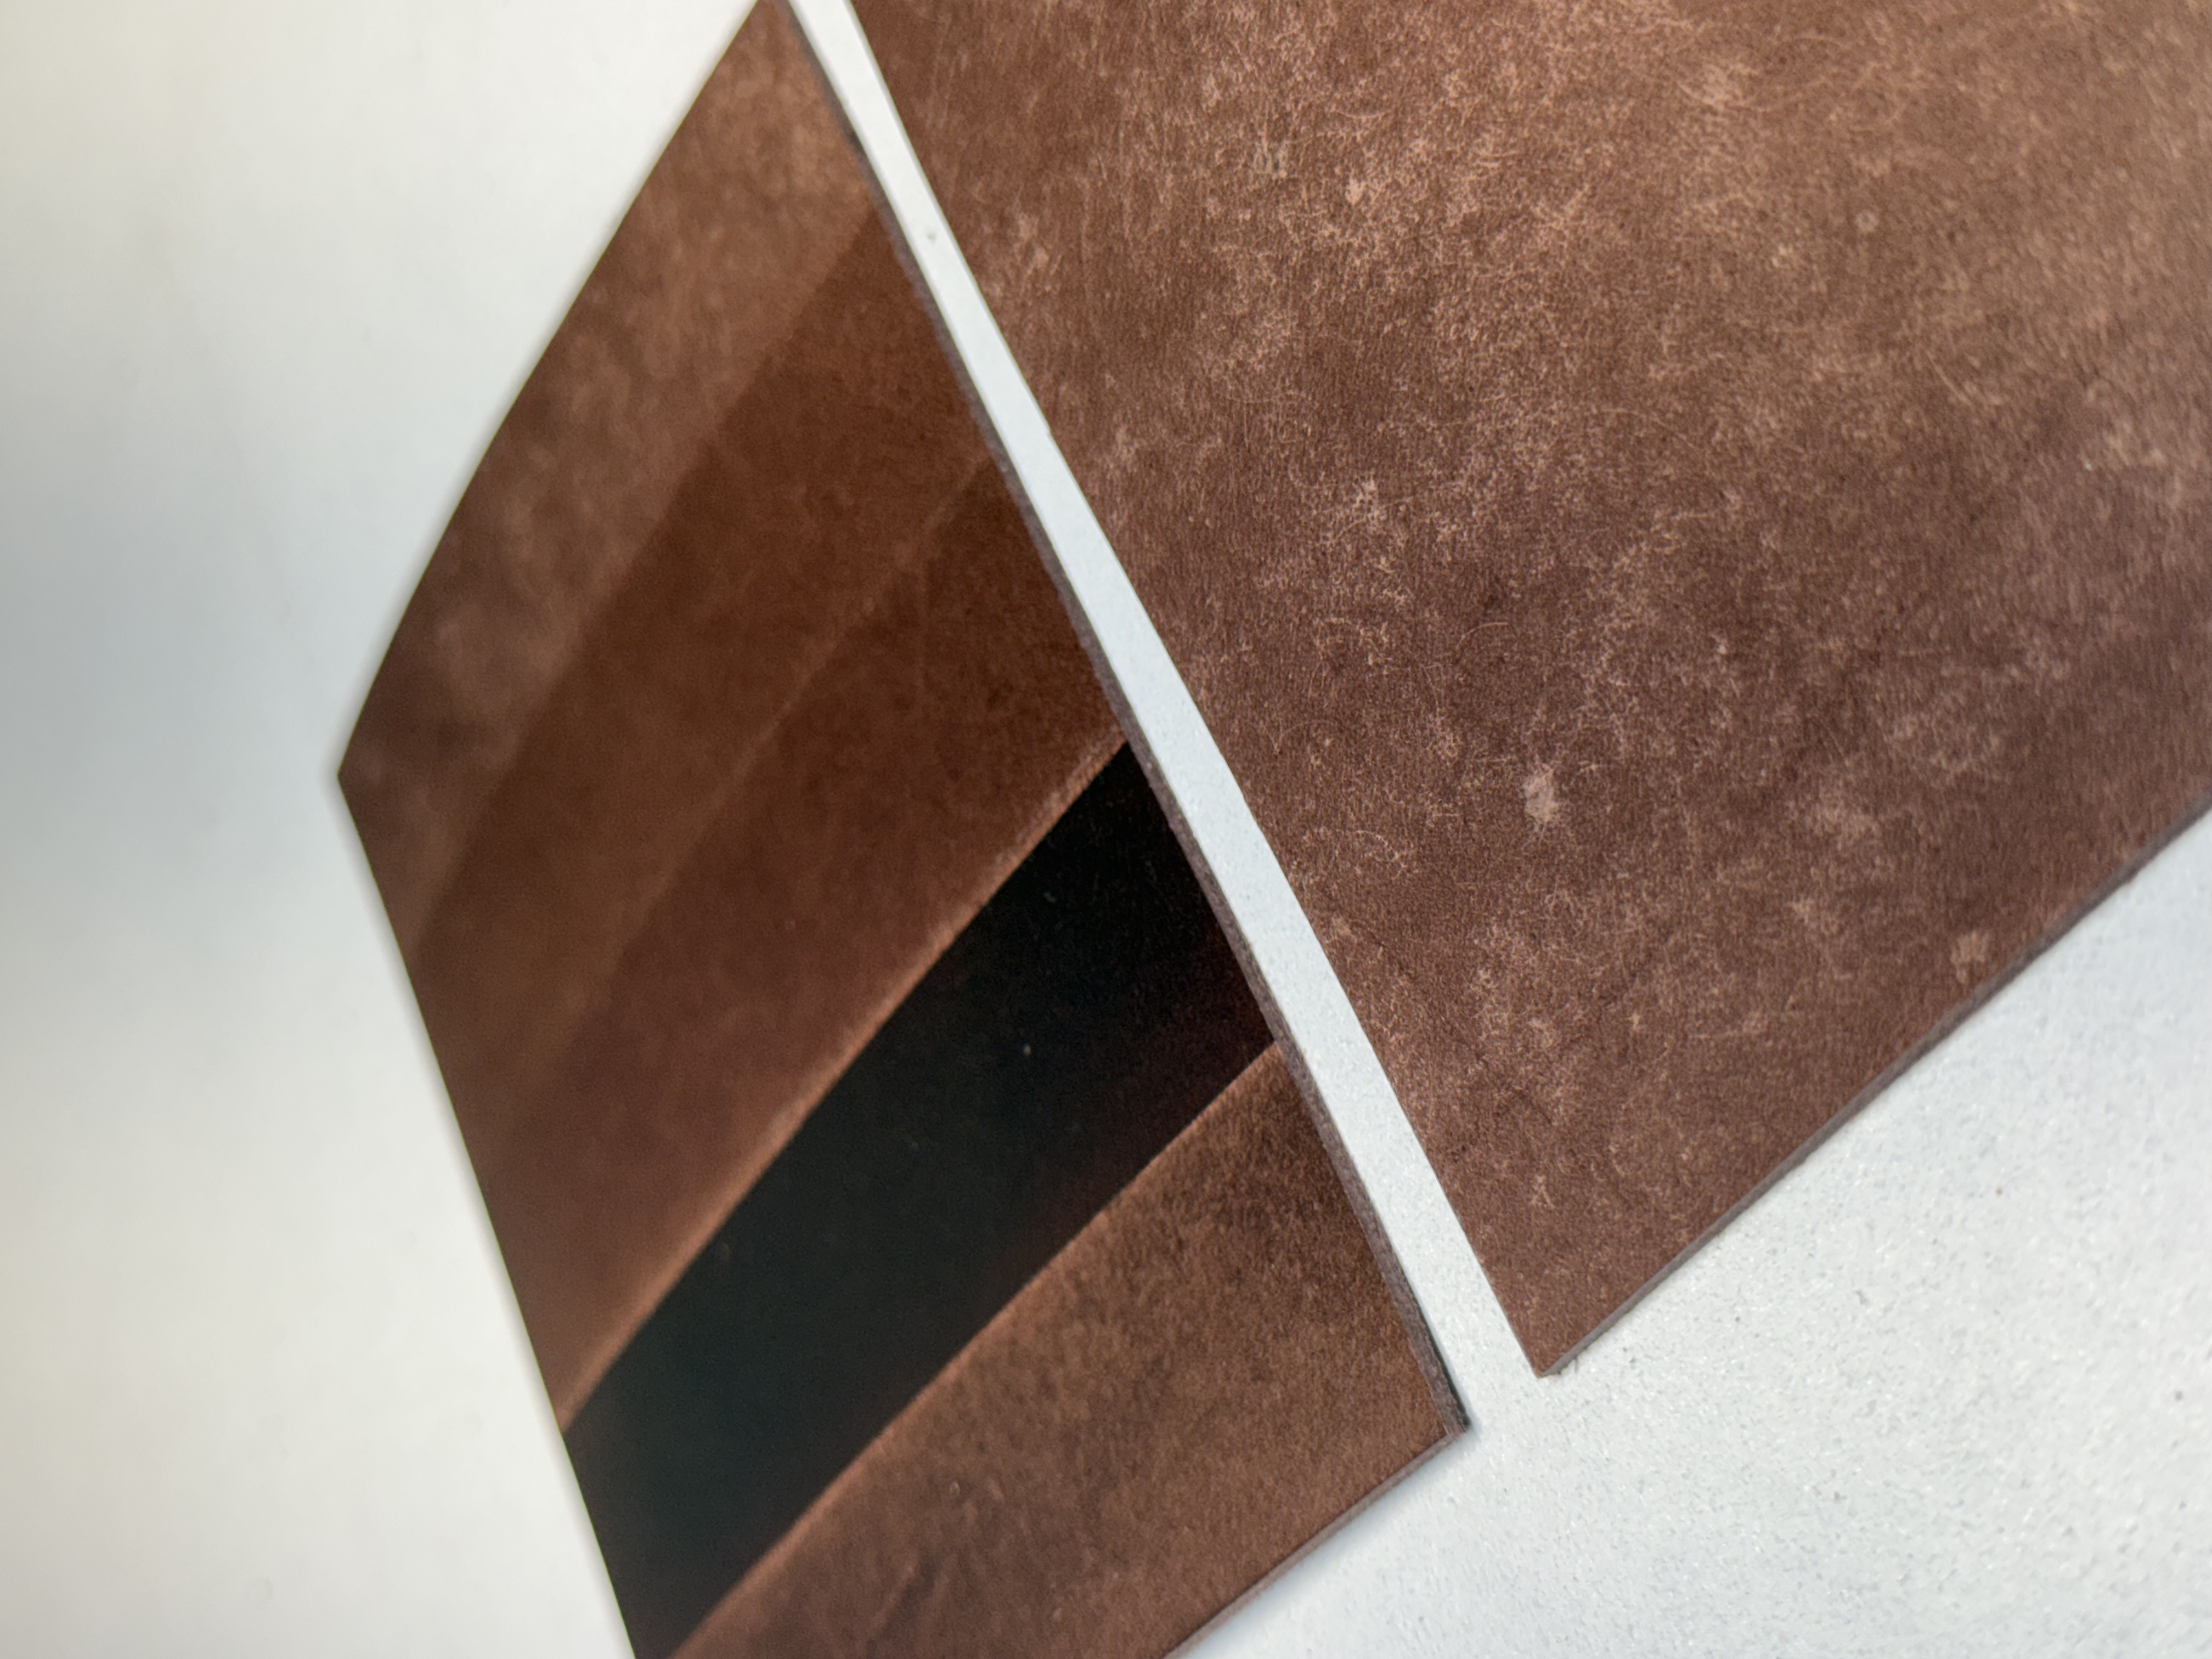
My Observations After Roughly 24 Hours
Treatment | Appearance | Feel & Response |
|---|---|---|
Light Paraffin Wax | The subtlest reference treatment. | Smoother, with a slight waxiness after rubbing with my fingertips. |
Saphir Mink Oil | A restrained matte effect that dampened reflectivity. | Luxuriously soft without stickiness; my favorite hand feel. |
Duff’s Conditioner | Enriched the natural color and depth. | Pleasant scent and a softer feel; a successful but less compelling middle ground. |
Saphir Renovateur, Neutral | By far the darkest band; strongly evened the appearance. | The most supple result, with a compact surface. |
Fiebing’s Leather Balm with Atom Wax | Brought out fine grain detail and stronger surface contrasts. | Added softness while making surface differences more noticeable to the fingers. |
Renovateur made the leather more supple while tightening the surface, as though the fibers had settled into a denser arrangement. A curious combination. After buffing, that band even seemed to sit slightly below its neighbors. I could feel the difference, though I made no measurement to establish actual shrinkage.
With Fiebing’s Leather Balm with Atom Wax, the same linen rubbing made differences more conspicuous. Darker islands emerged, and the fine crenellations of the grain stood out enough that I felt I could distinguish individual follicles. The harder I rubbed, the clearer those differences became. I could smell it, too. The untreated piece had no characteristic leather smell that I could detect; afterward there was a leather-like scent, with some dressings contributing their own fragrance.
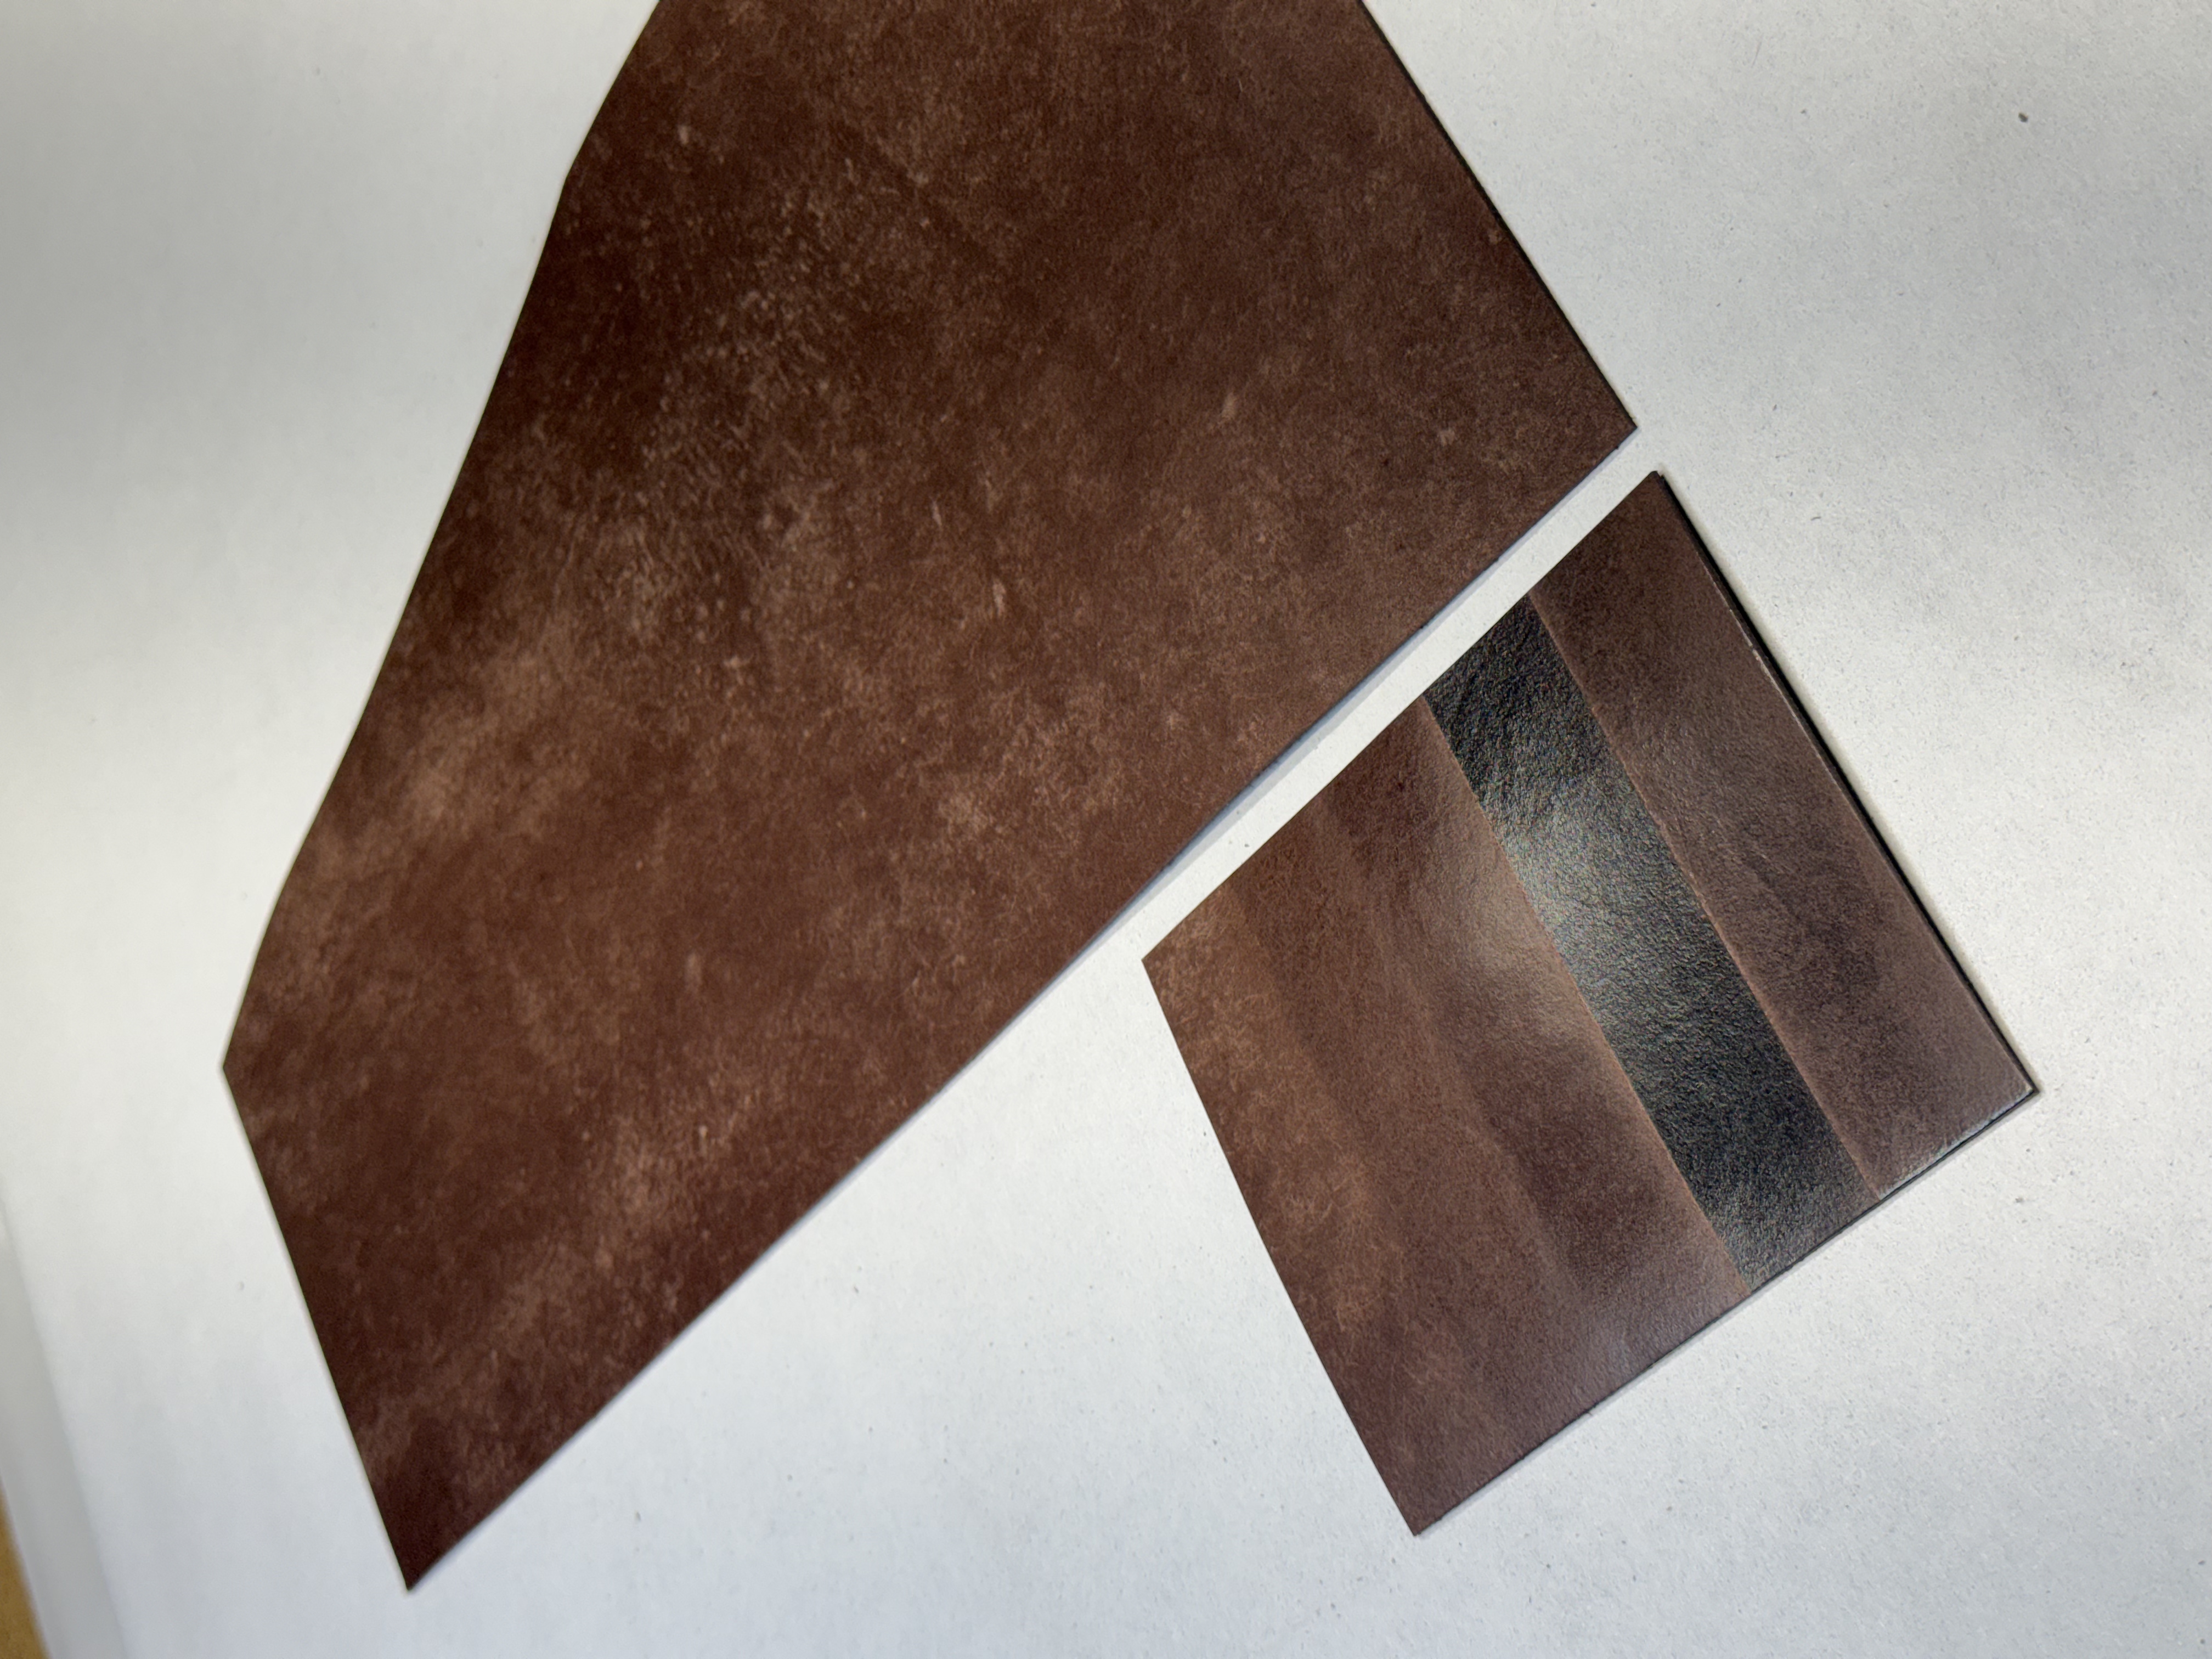
This angle makes the distinction between darkness and reflectivity especially clear. The Renovateur band was by far the darkest, yet returned the brightest reflection; Duff’s came next. Mink oil moderated the sheen, and its matte finish suited the luxurious softness I felt under my fingers. In retrospect, Saphir mink oil would be my choice for treating the whole piece, despite the expense of using it so liberally. I chose the balm. I hoped that darkening the leather, while drawing out its grain, might multiply the constellation of surface artifacts.
4. Making the Belt
Making a belt from a belly seemed like an obviously bad idea. But I couldn’t resist, in part because Maya so directly contradicted my ideas about bellies.
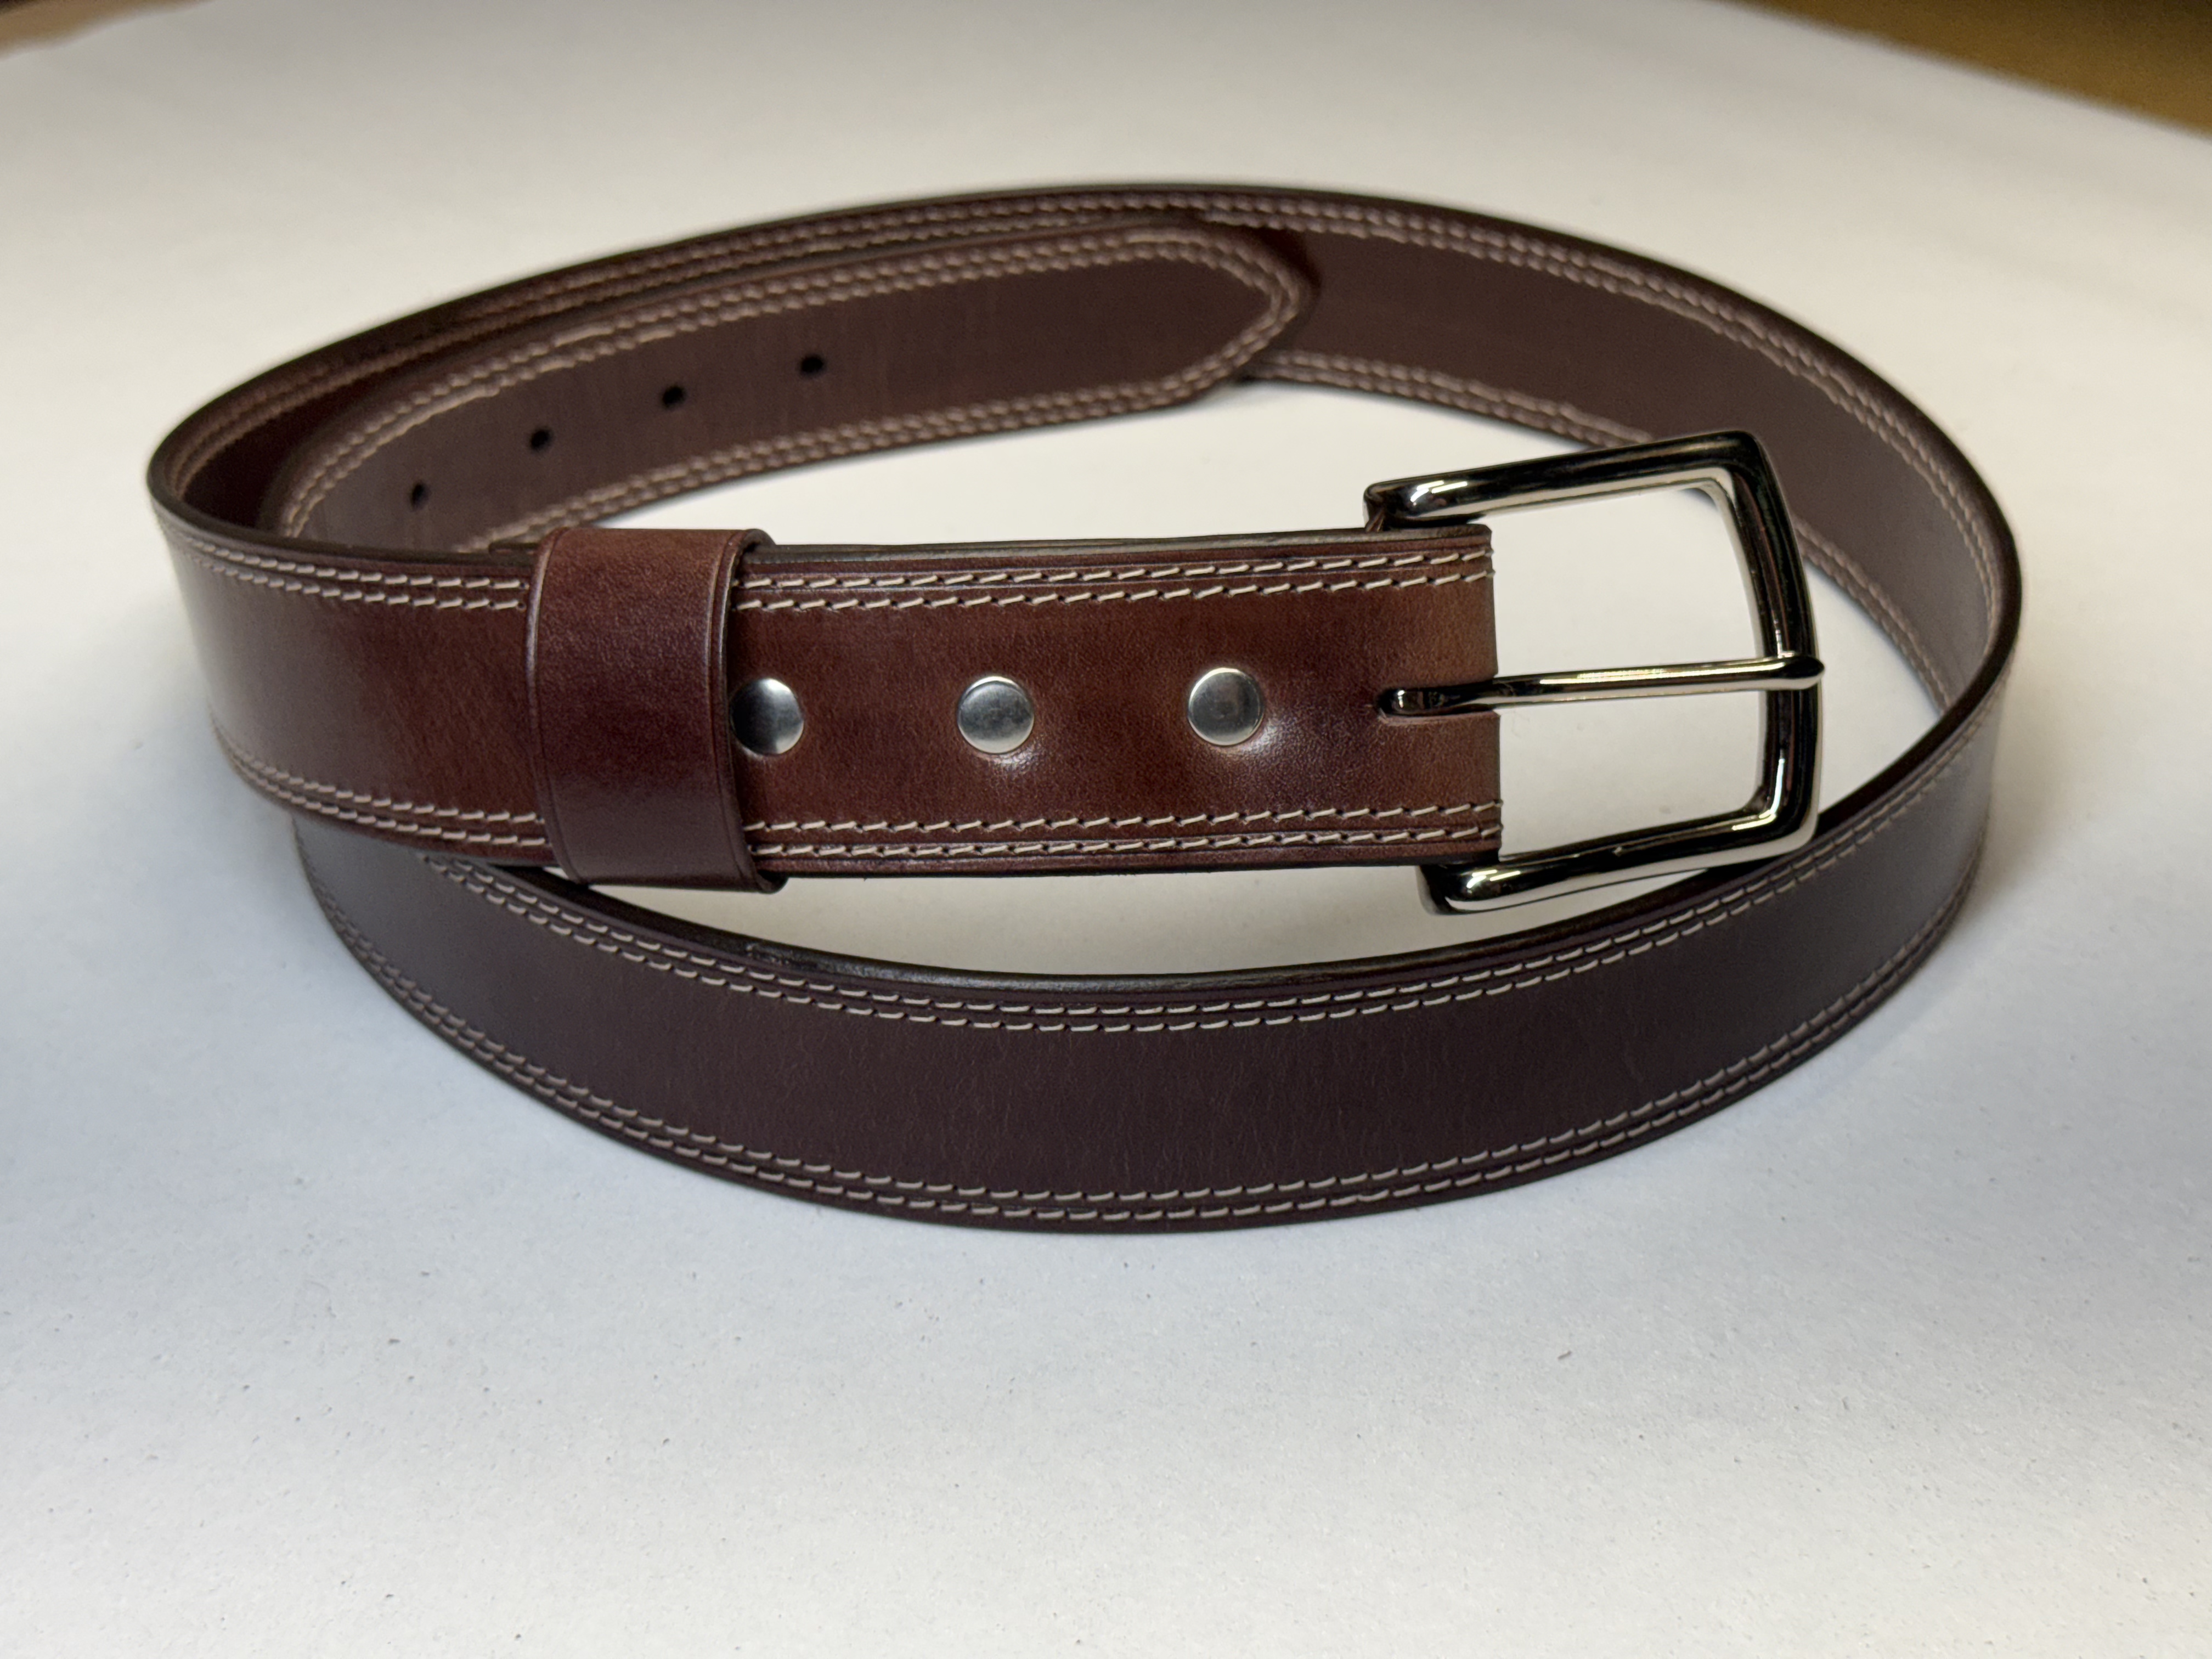
I cut two strips long enough for a 48-inch belt and reversed one end for end, intending any differences in strength along their lengths to balance each other. I bonded them flesh to flesh with Renia Aquilim 315, my usual water-based adhesive for work that will also be sewn. After trimming, I pulled on the belt again. It wouldn’t budge. Around my waist it felt supportive and bent comfortably with my body. It probably needs some breaking in.
Before sewing or installing the hardware, I painted both faces with 'Leather Balm with Atom Wax' using a foam brush. I allowed about ten minutes for absorption, then rubbed vigorously with stiff linen. At first, I thought I’d made it worse. Fine streaks ran through the chocolate-brown surface, and the constellation had disappeared. The grain had acquired definition, but much of that detail required close inspection under raking light. By the following morning the streaking had diminished, and another pass with the linen reduced it further.
Edge Finishing and Machine Sewing
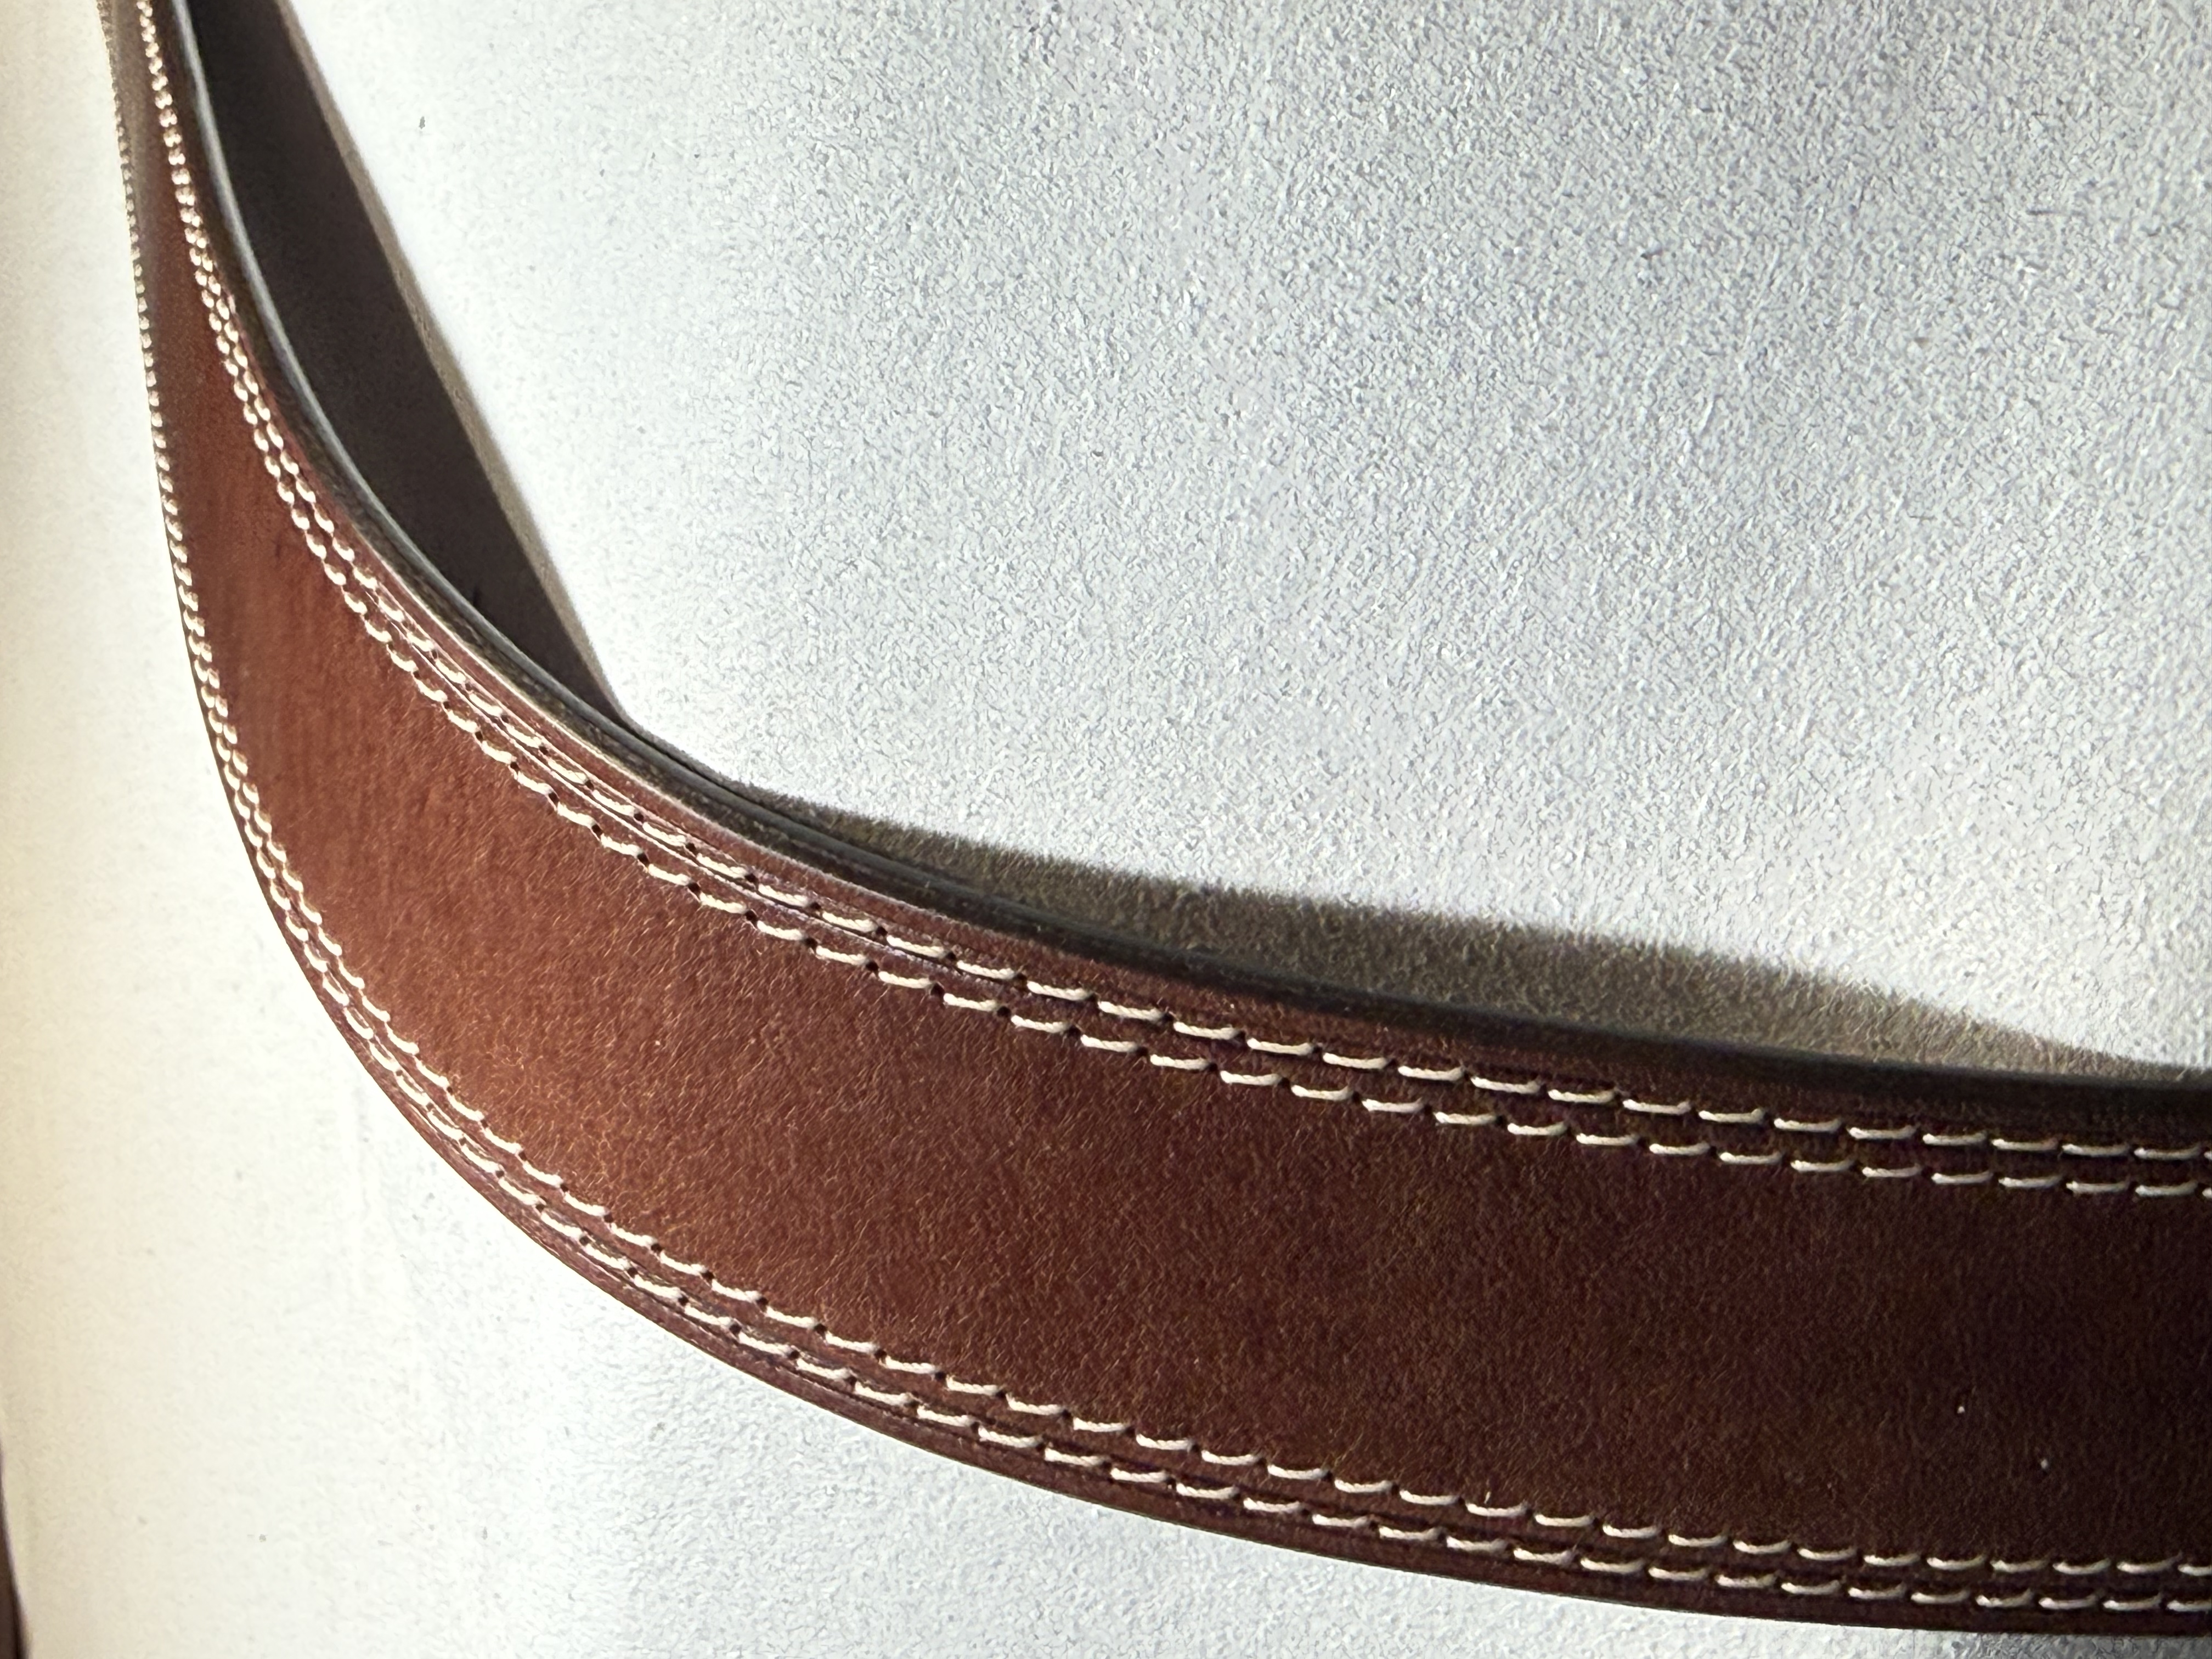
I have never worked with a leather that sanded so well. When I sand laminated edges, the glue can smear or leave an uneven surface. Here the two layers sanded as one. Both my standing sanding machine, made by the Leather Machine Company, and hand sanding produced a clean edge. Sanding mushroomed the edges, as I expected, and I worried that the uneven grain would make beveling difficult. Each edge came away in a single continuous stroke. Tokonole then brought it to a fine finish, which I almost left unpainted. Dark-brown Fiebing’s Edge Kote adhered immediately and gave me a clean final line.
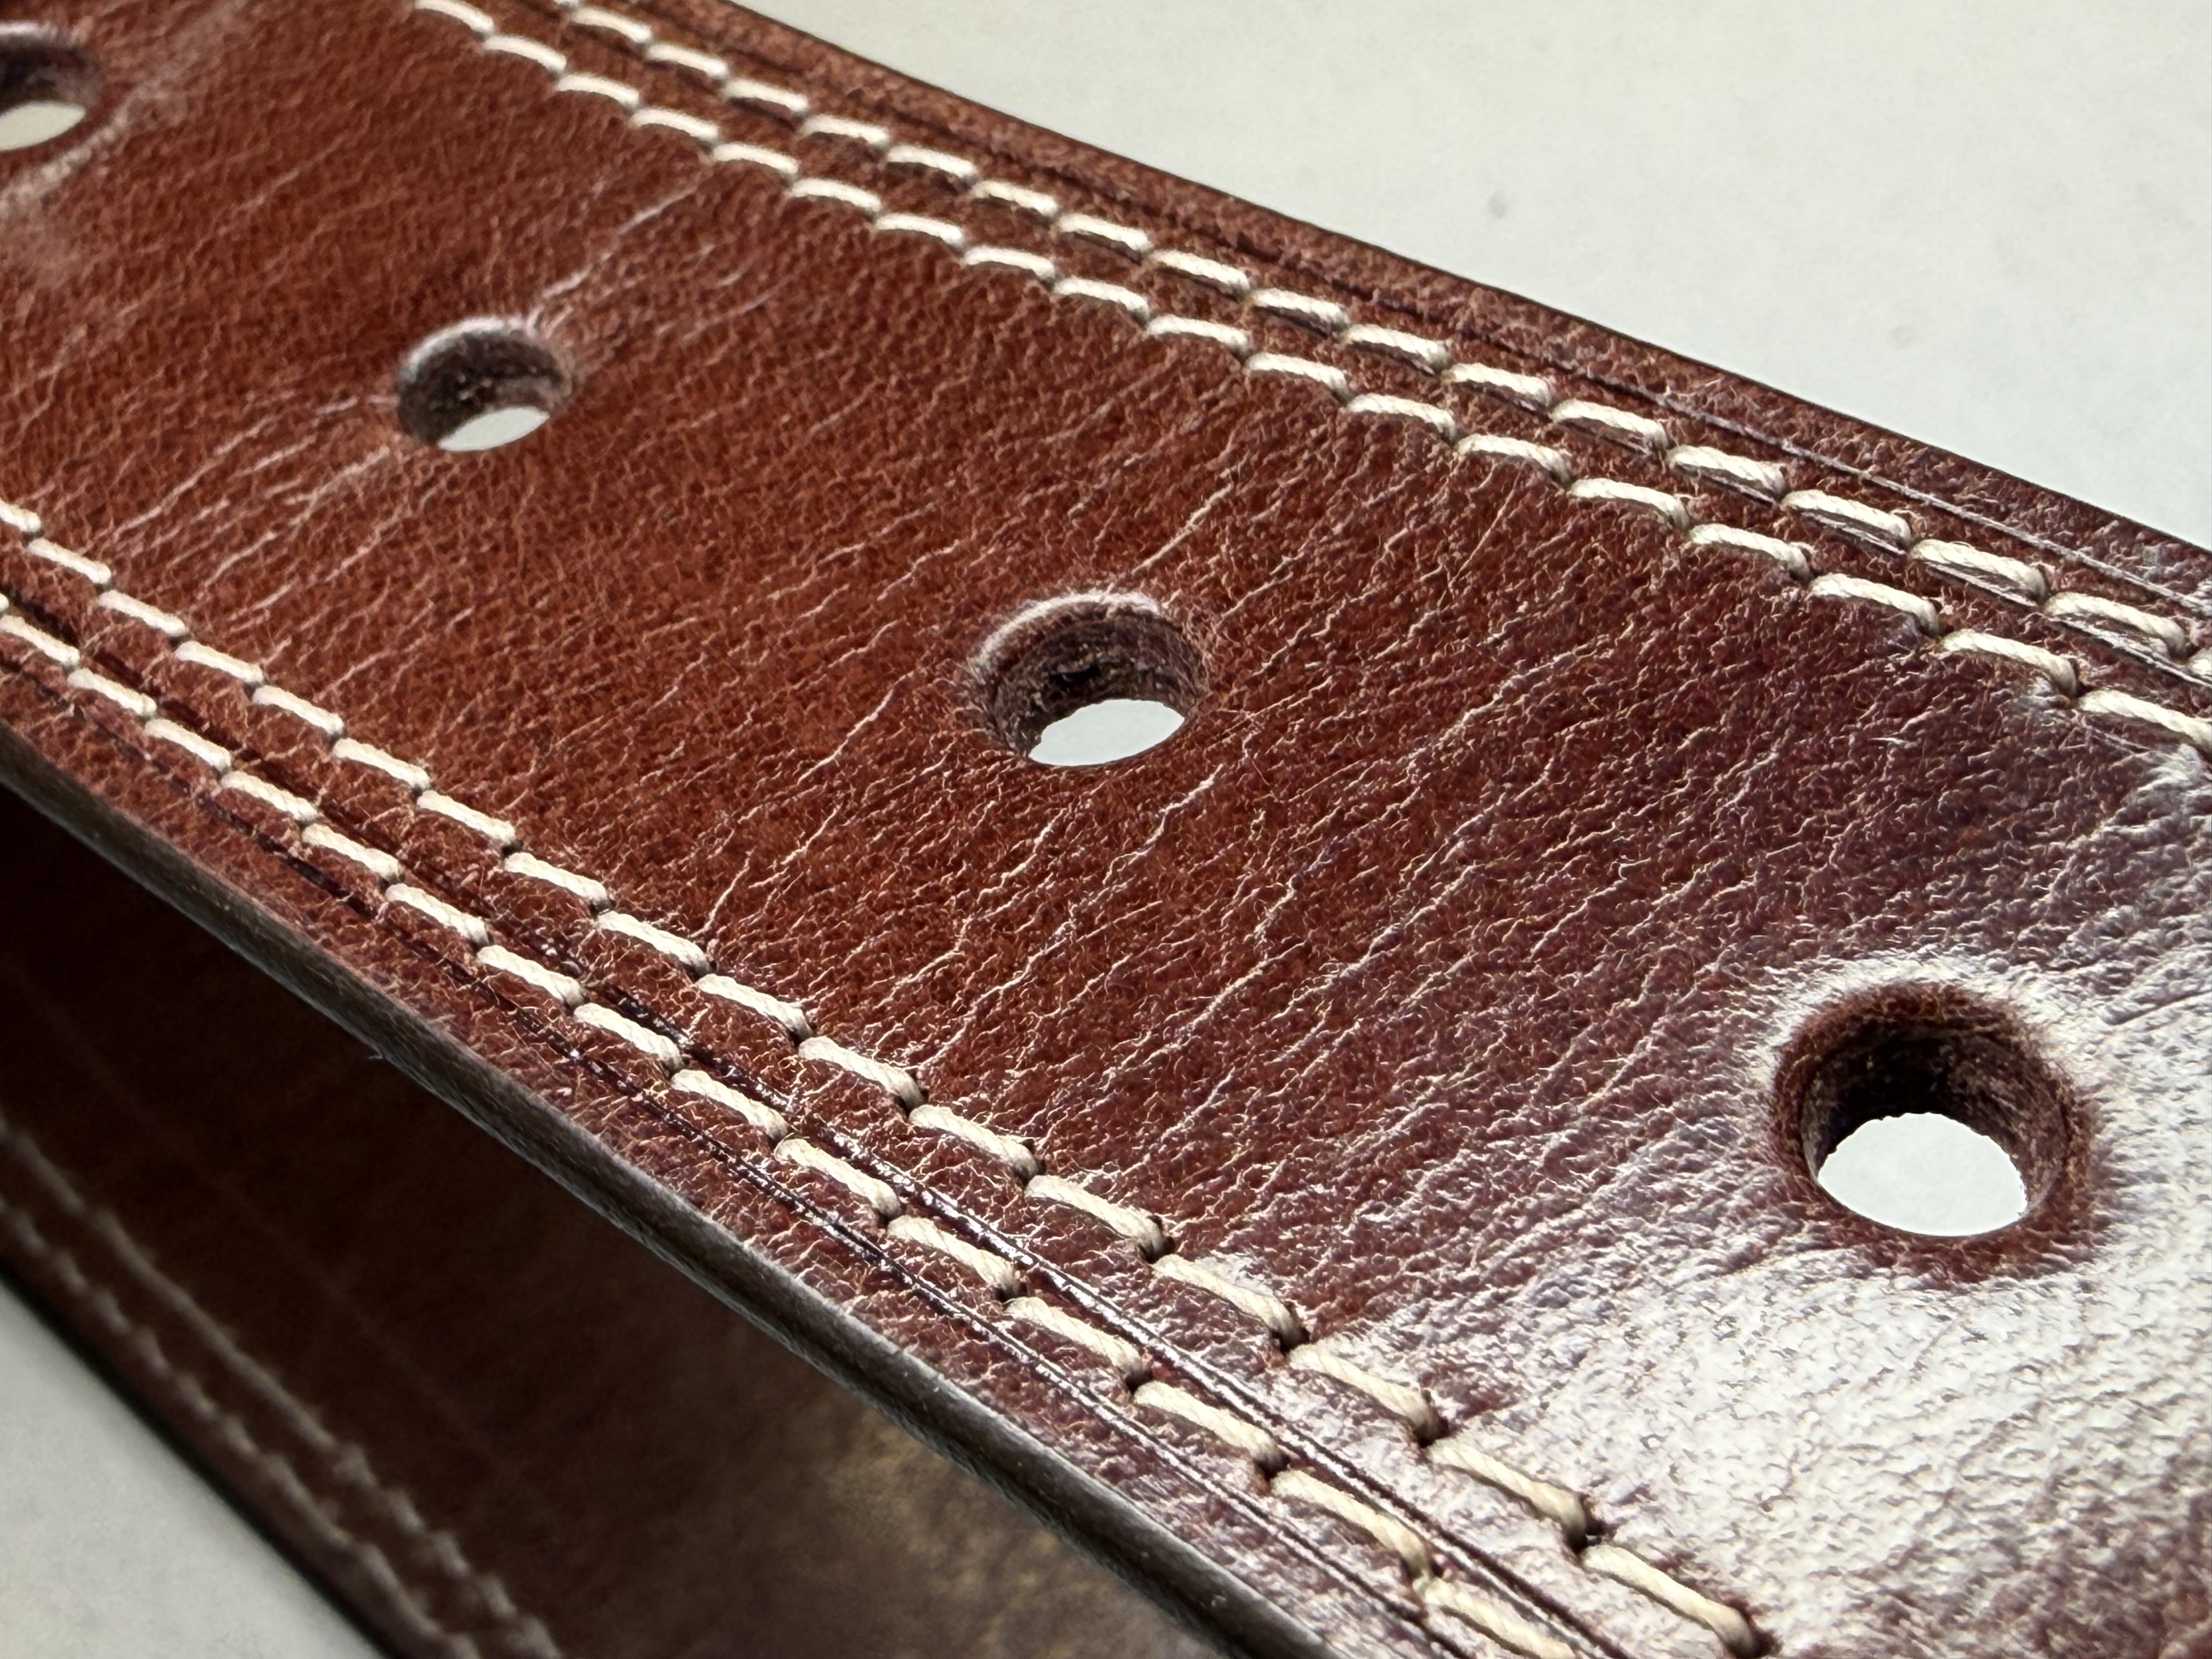
I machine-sewed the belt in the interest of time, running two rows along each edge because I liked the way they framed the surface. Nearly every stitch came out as intended. The layers stayed firmly bonded. The leather also accepted the heated electric creaser beautifully. I left the stitches unhammered, although I normally flatten them, because I wanted to see the grain without inadvertently polishing the areas around the sewing. That’s why they sit proud of the surface.
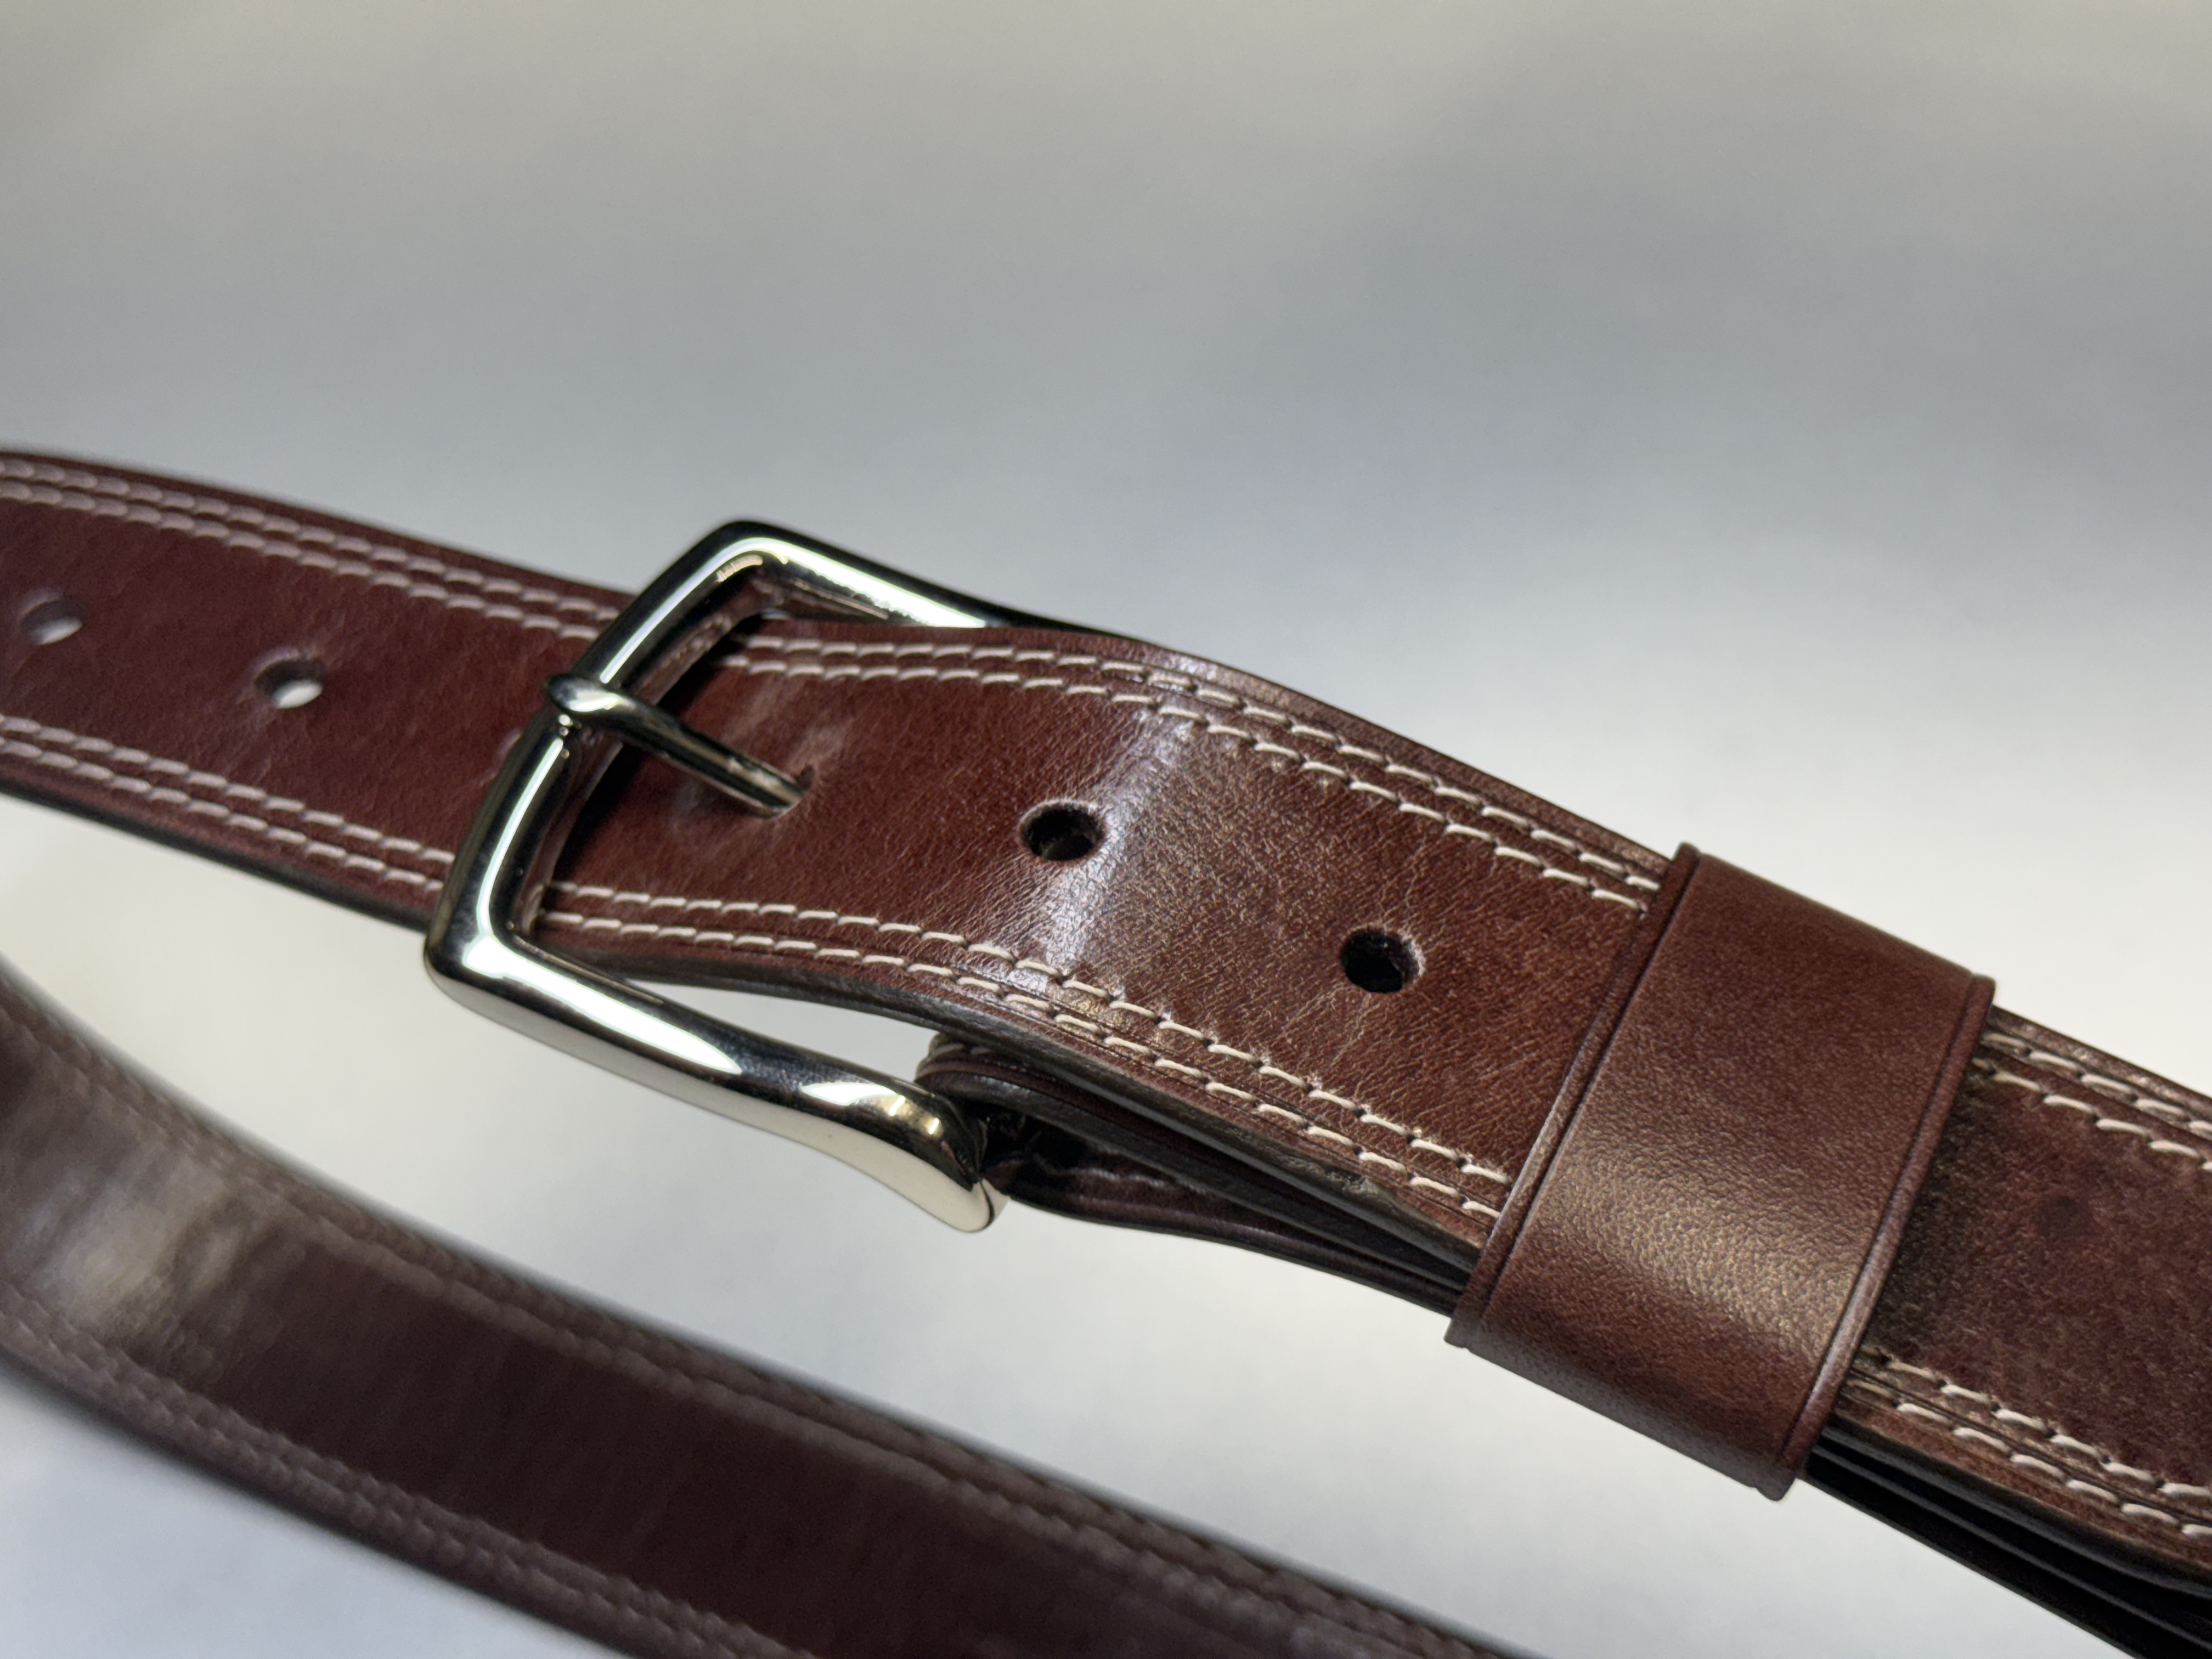
A closer look reveals a problem. To the right of the keeper is a dark circle. An insect bite. Another, just beneath a sizing hole at the bevel, concealed weakened material. The beveler broke into it and chewed away a small area. I had missed the mark until I cut into it.
5. Making the Sheath
The kitchen-knife sheath gave me a second experiment, this time with hand sewing and a painted edge. To burnish the surface, I vigorously worked a dollop of Tokonole with a rough linen cloth. I’d used it this way before. Tokonole can help some leathers develop a supple feel and an attractive sheen. I wanted to see whether I could get the same result on Maya.
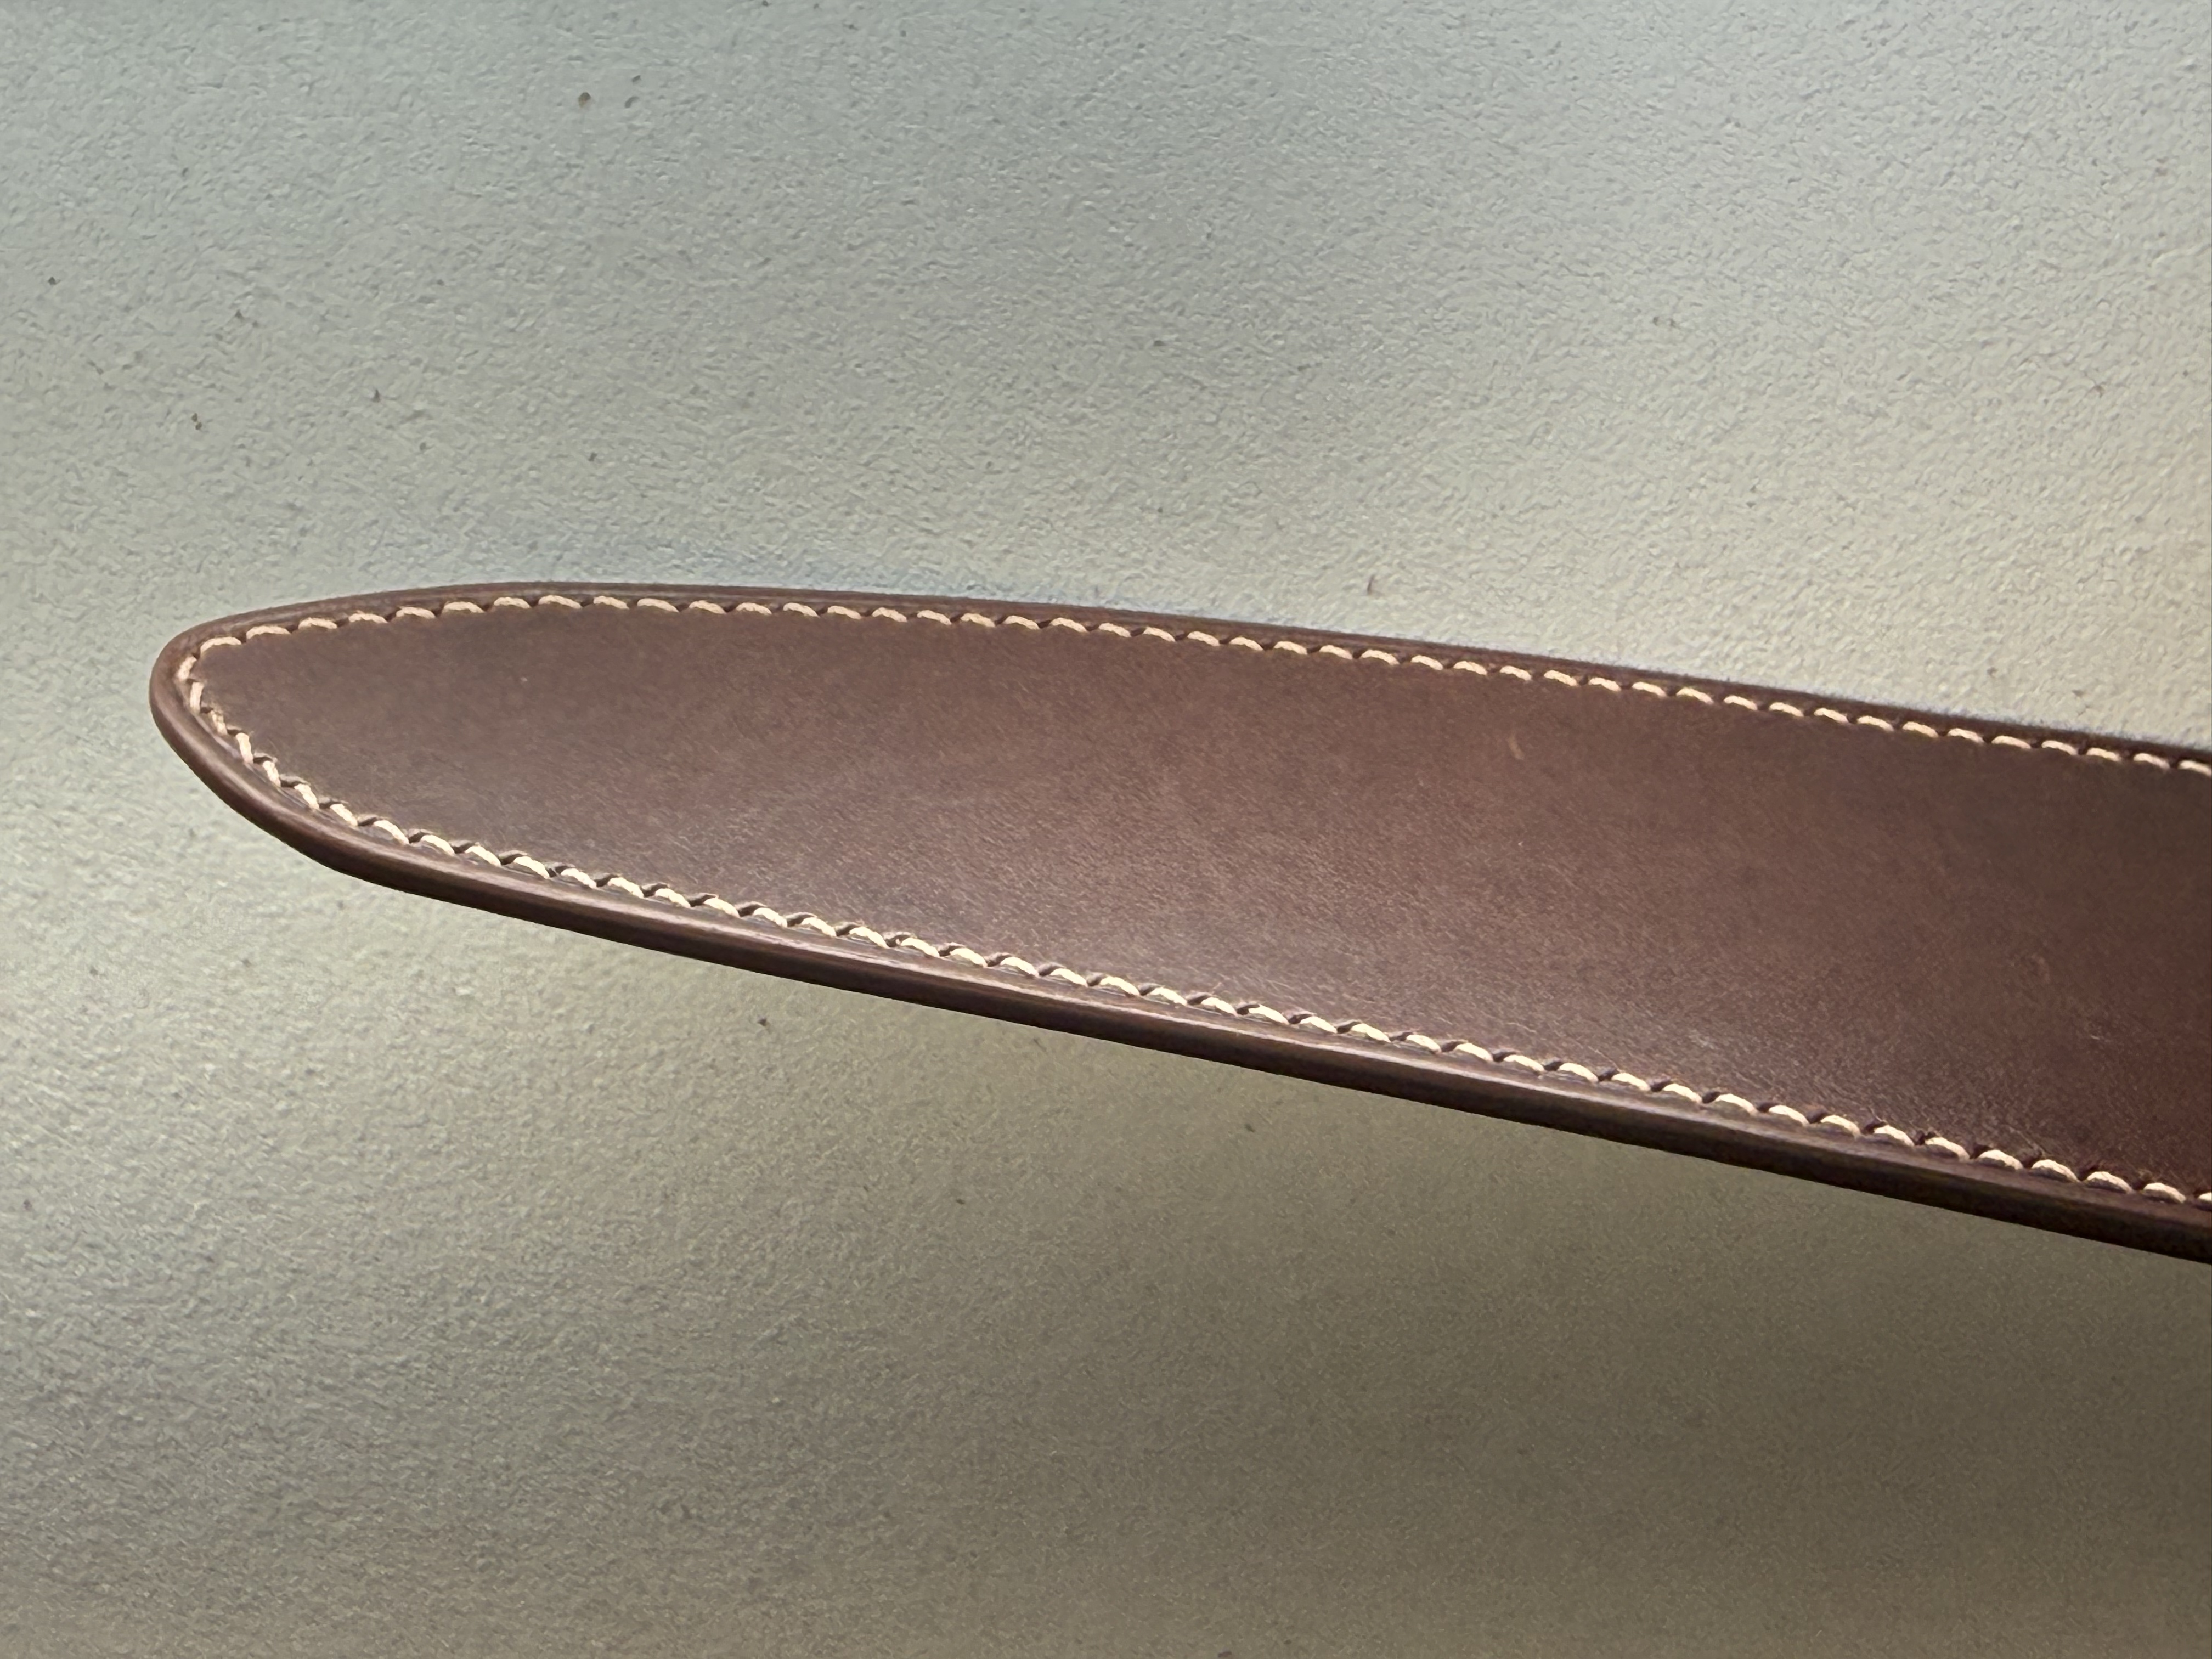
I cut two matching pieces and applied adhesive along their edges, then brought them together with a light hammering to secure the bond. This is a prototype, so I skipped making an edge-matched riser to give the sheath proper thickness. The Tokonole treatment caused the color to move towards walnut. Much of the red was gone.
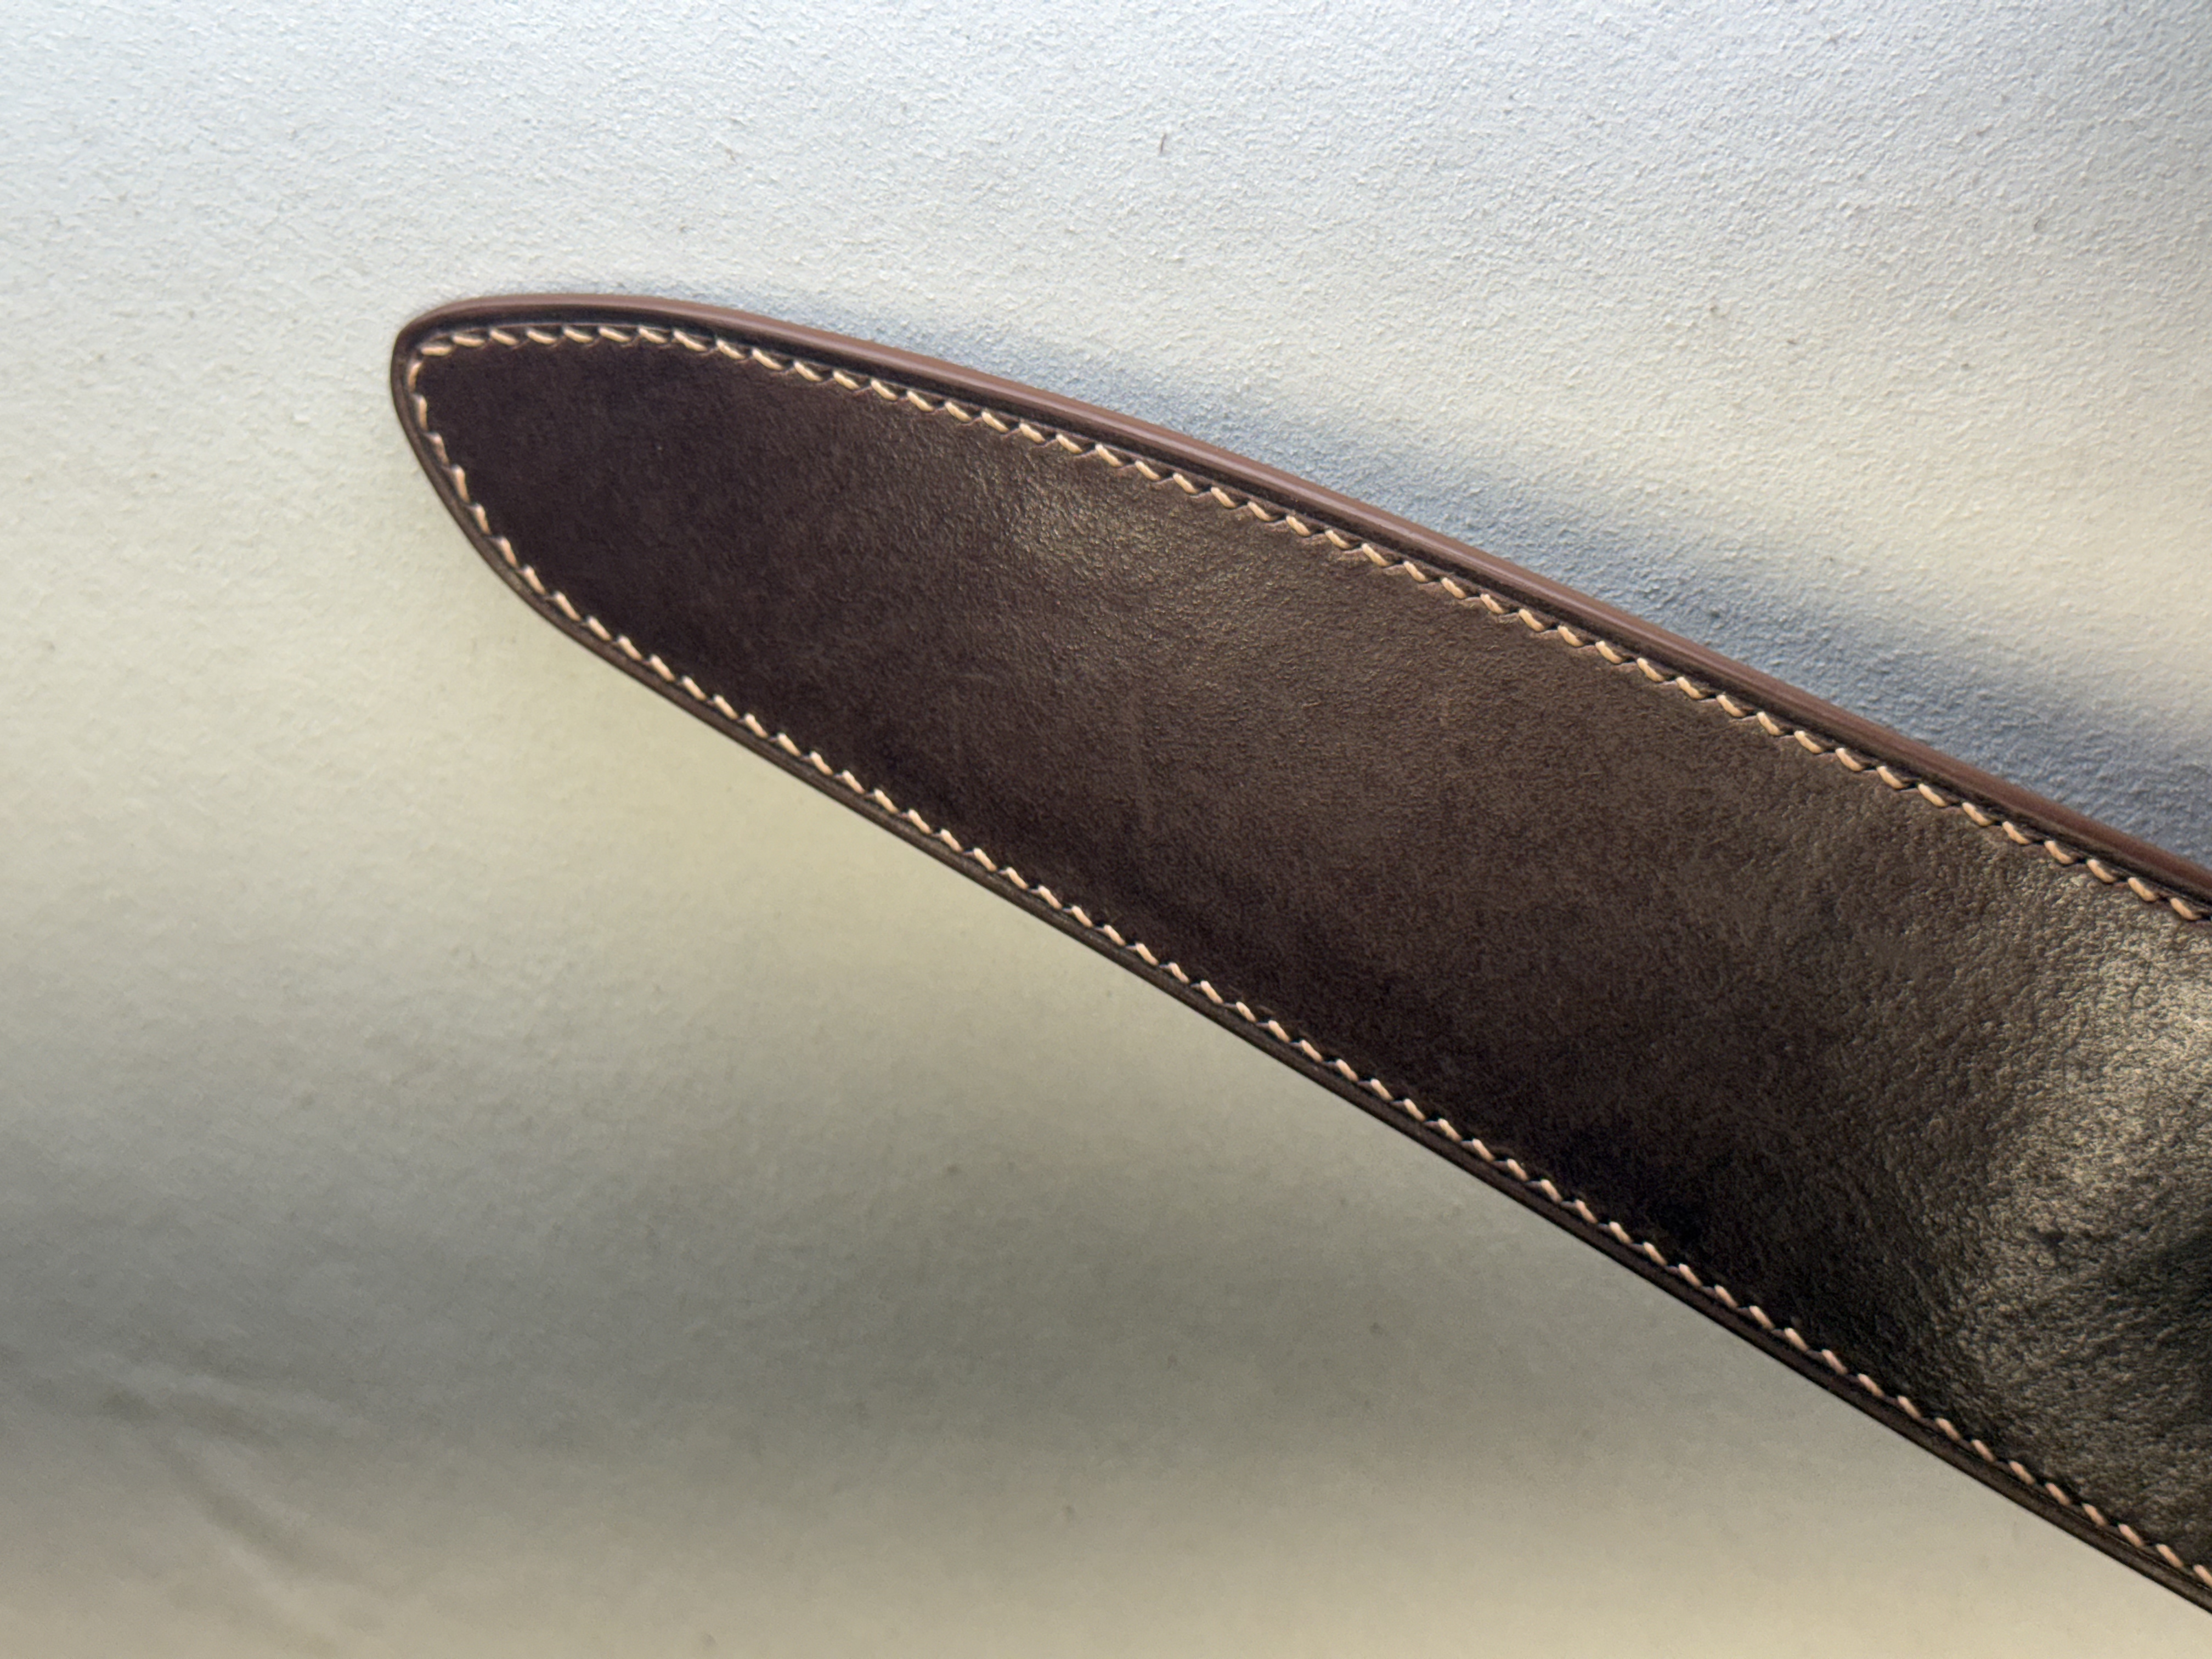
Under this light, the sheen seemed to sit uneasily on the grain, giving it a plastic quality I could also feel under my fingers. Smooth, with no added suppleness. I suspected the Tokonole was sitting more on top and accentuating the mottling.
Edge Finishing and Hand Sewing
The construction itself was gratifying. Hand sanding produced a clean edge, and medium-brown Giardini edge paint adhered well, giving a smoother finish with a little contrast against the darker face. I used a creased guide line with 3.38 mm stitch spacing, carefully tightening each thread as I worked. The irons entered cleanly, and the needles passed without difficulty. Some leathers fight the stitch angle, even when I’m working carefully, and the seam ends up looking untidy. Here each stitch settled with remarkably even tension. I would happily hand-sew this leather again.
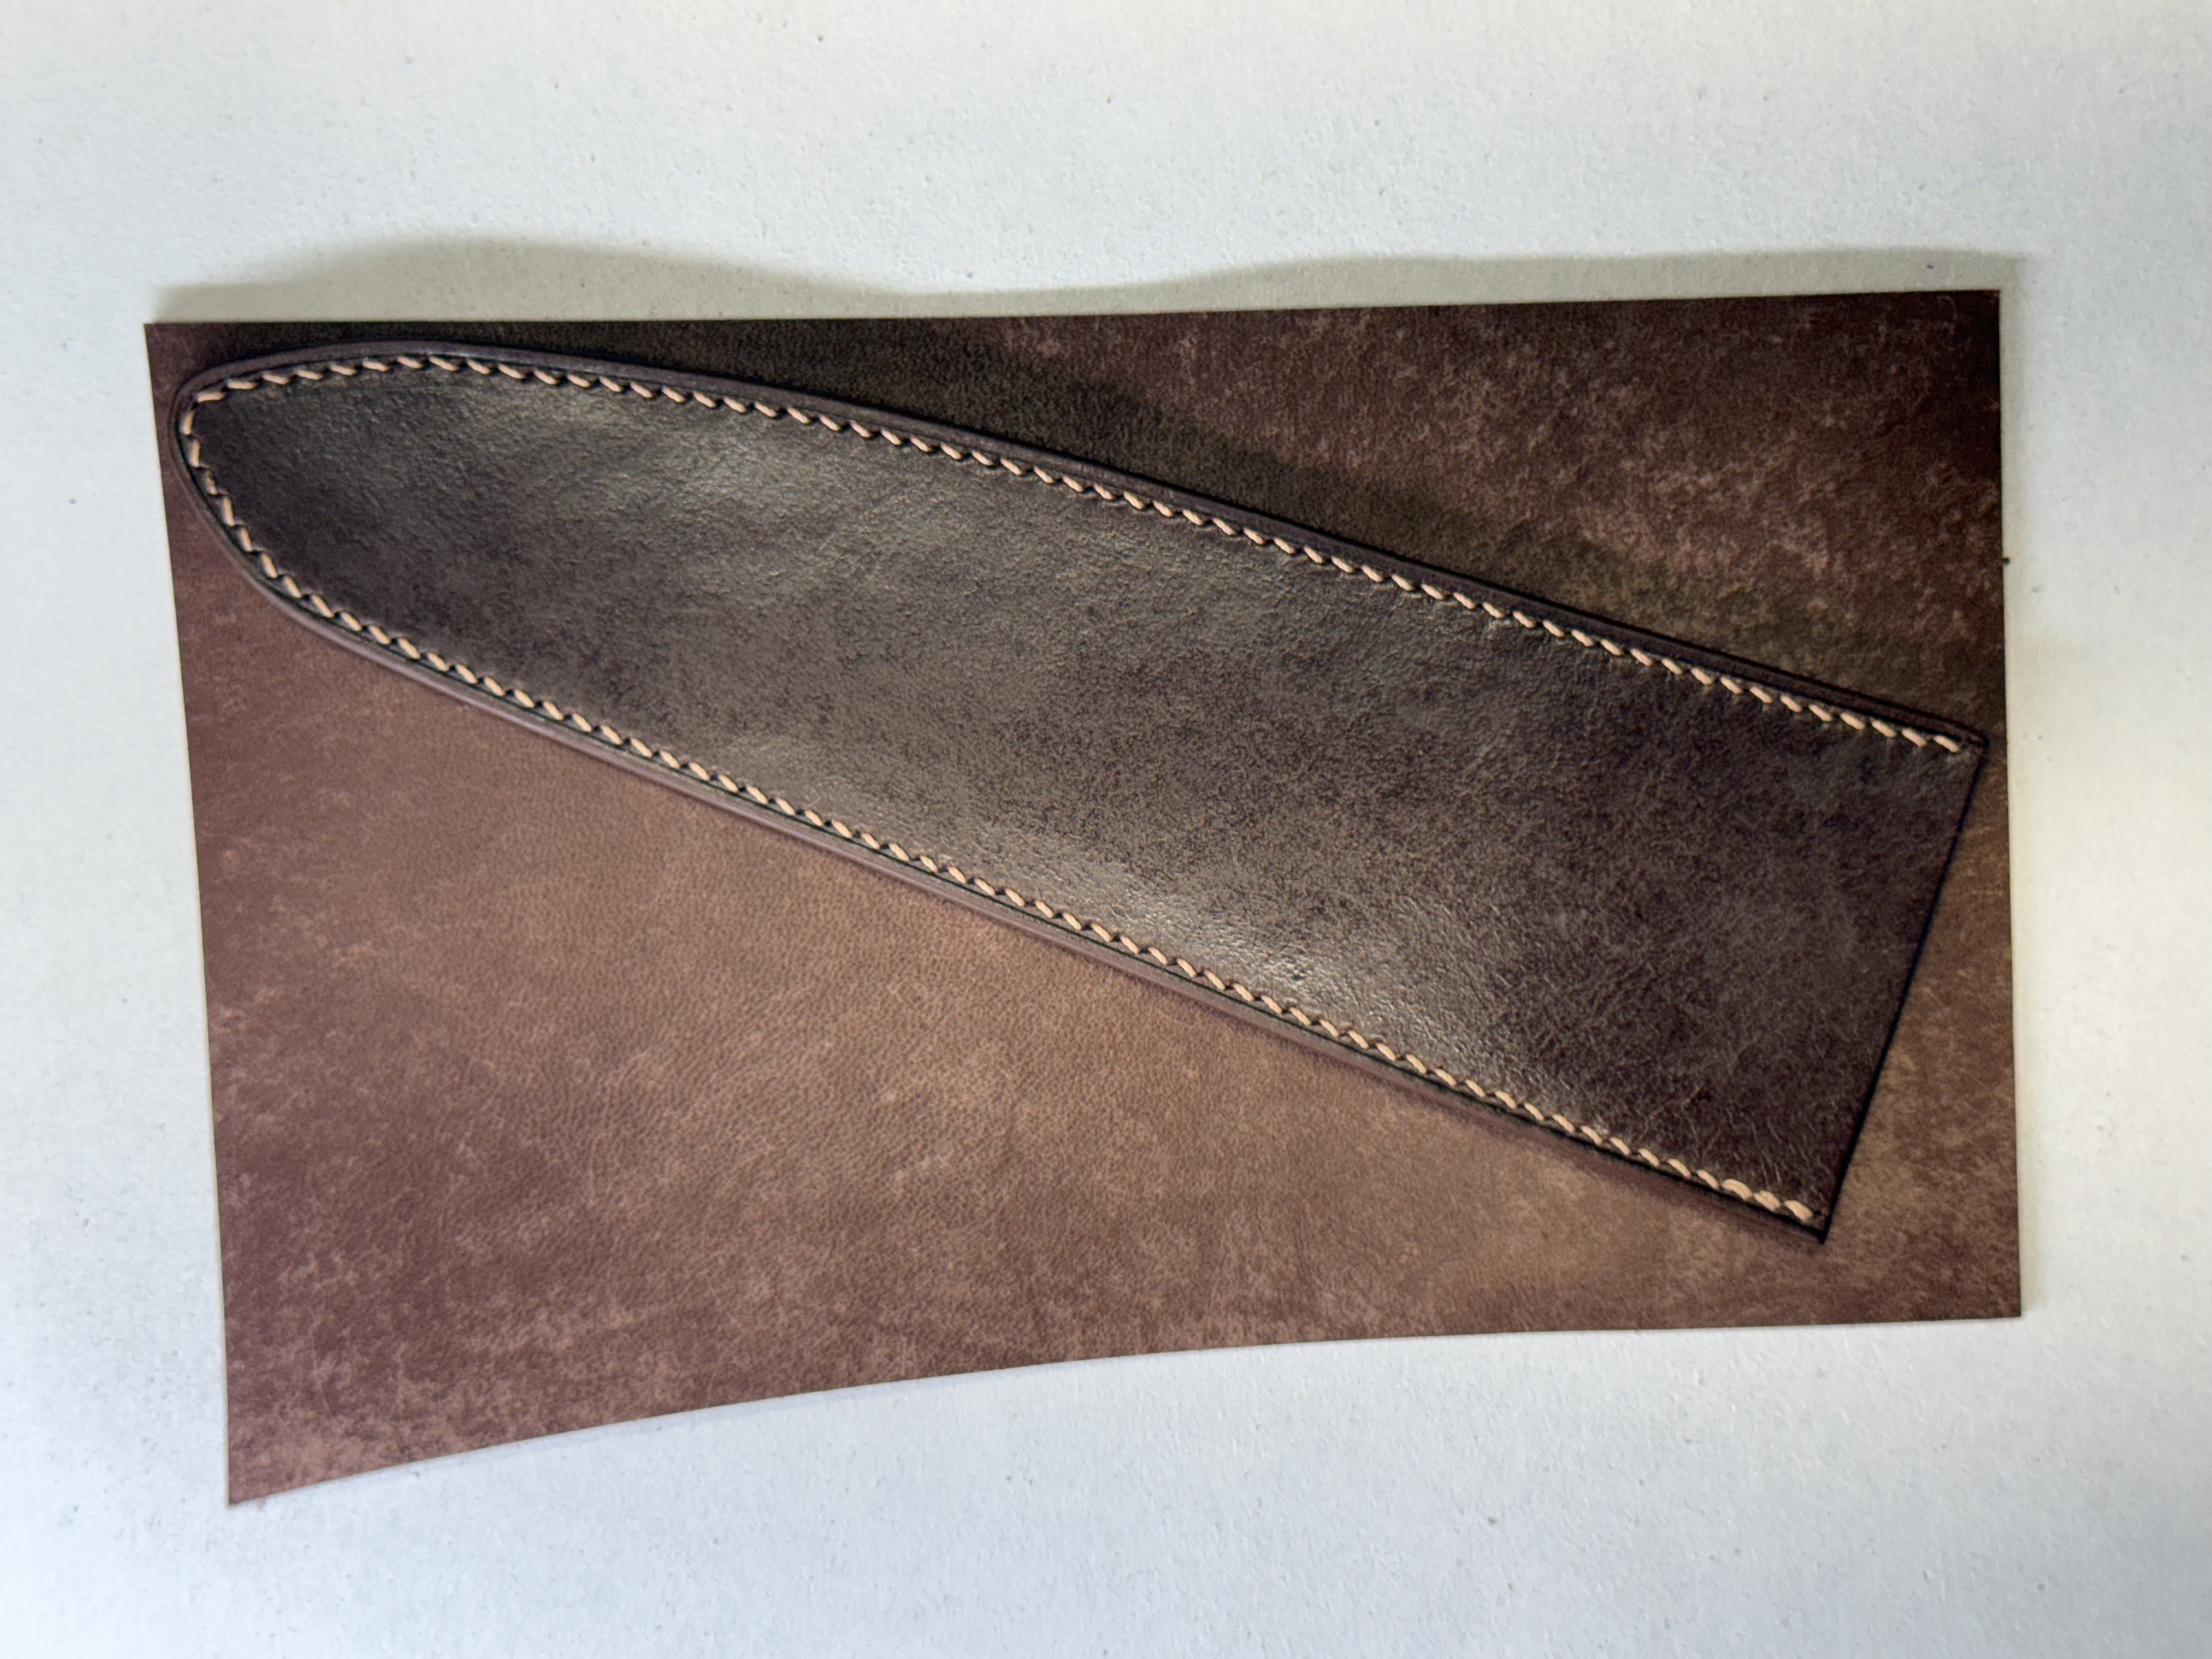
Side by side, I preferred the untreated panel. Its surface absorbed light into a varied field of color, while the sheath returned it in mottled patches. I could find at least as much grain detail on the sheath, yet the untreated color had more depth. More detail hadn’t made a better finish.
6. Polishing the Belt
I returned to the belt with a very light coat of neutral Saphir Médaille d’Or Pâte de Luxe wax polish, applied to both faces and worked gently with a horsehair brush. I then took it into the kitchen, where natural light entered at an angle across the granite counter.
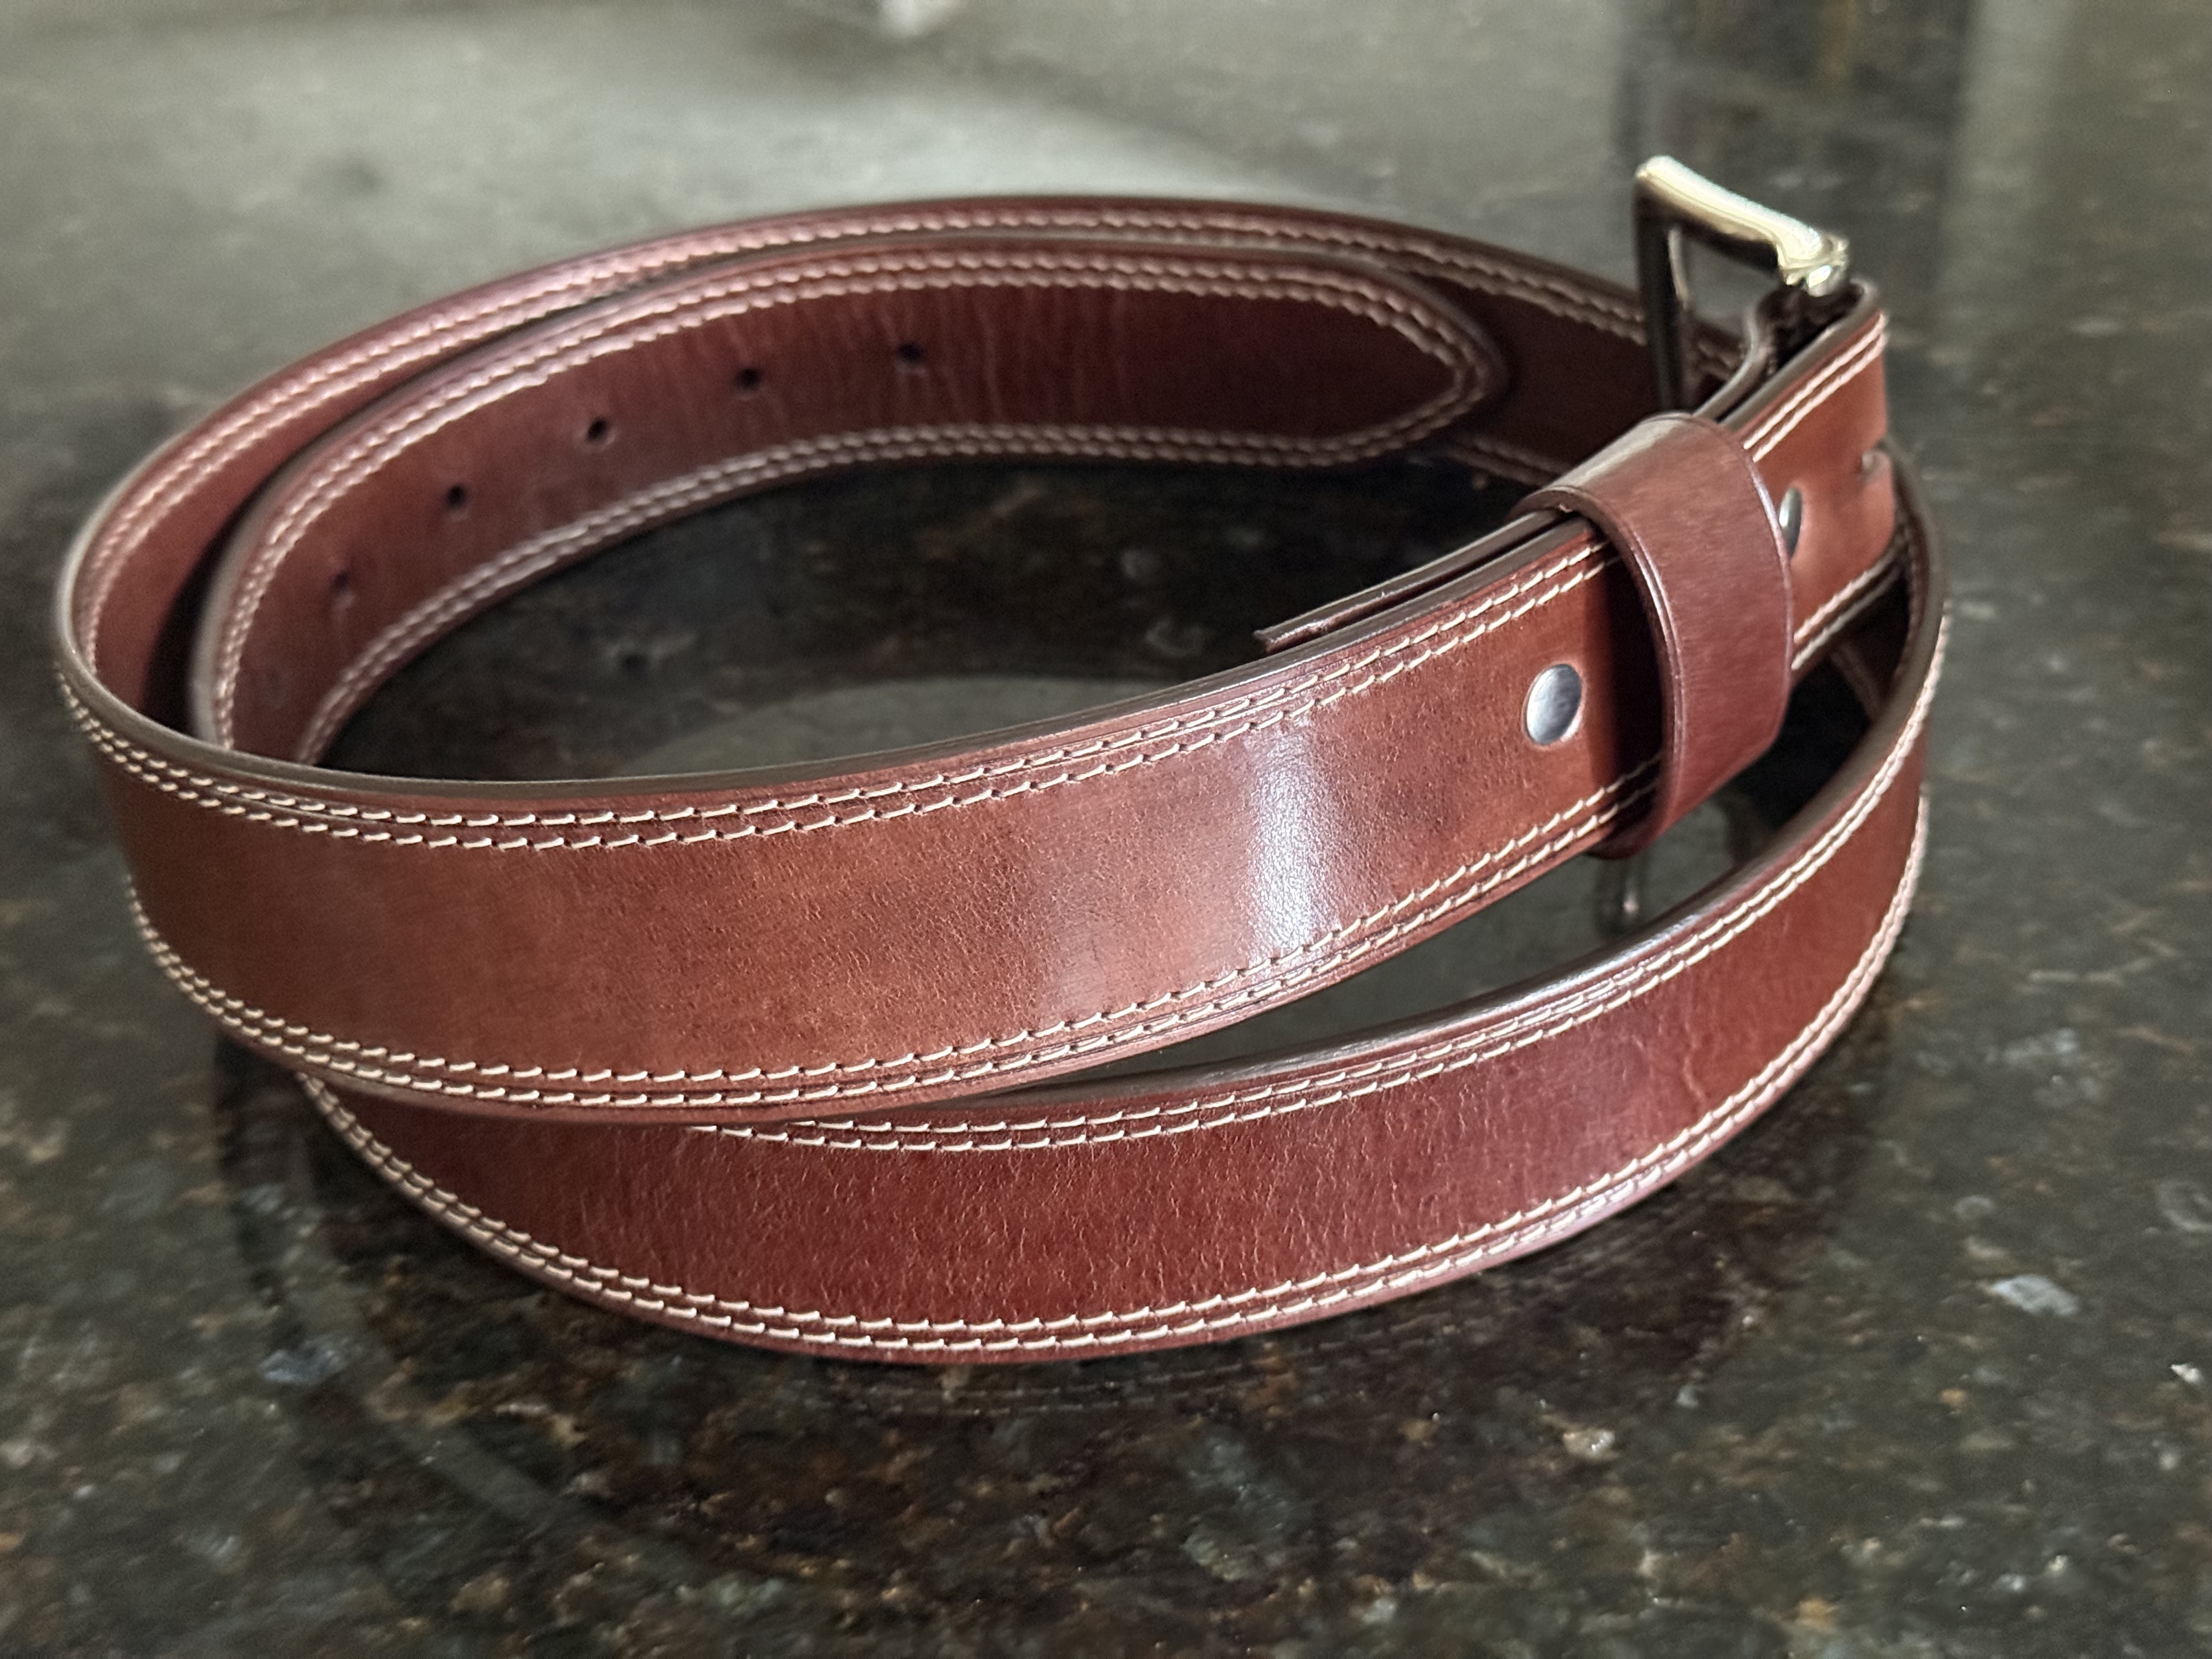
The color appeared lighter and more even, and the gloss had softened into a fine sheen that spread light across the surface while leaving the grain visible. Another five hours had elapsed, so some of the lightening may have come as the balm continued to settle. I was also judging it in daylight. The creamy feel seemed confined to the surface, and I doubted it would last long. I liked it anyway. The scent was an enigmatic blend of leather and camphor. The smell alone was a pleasure.
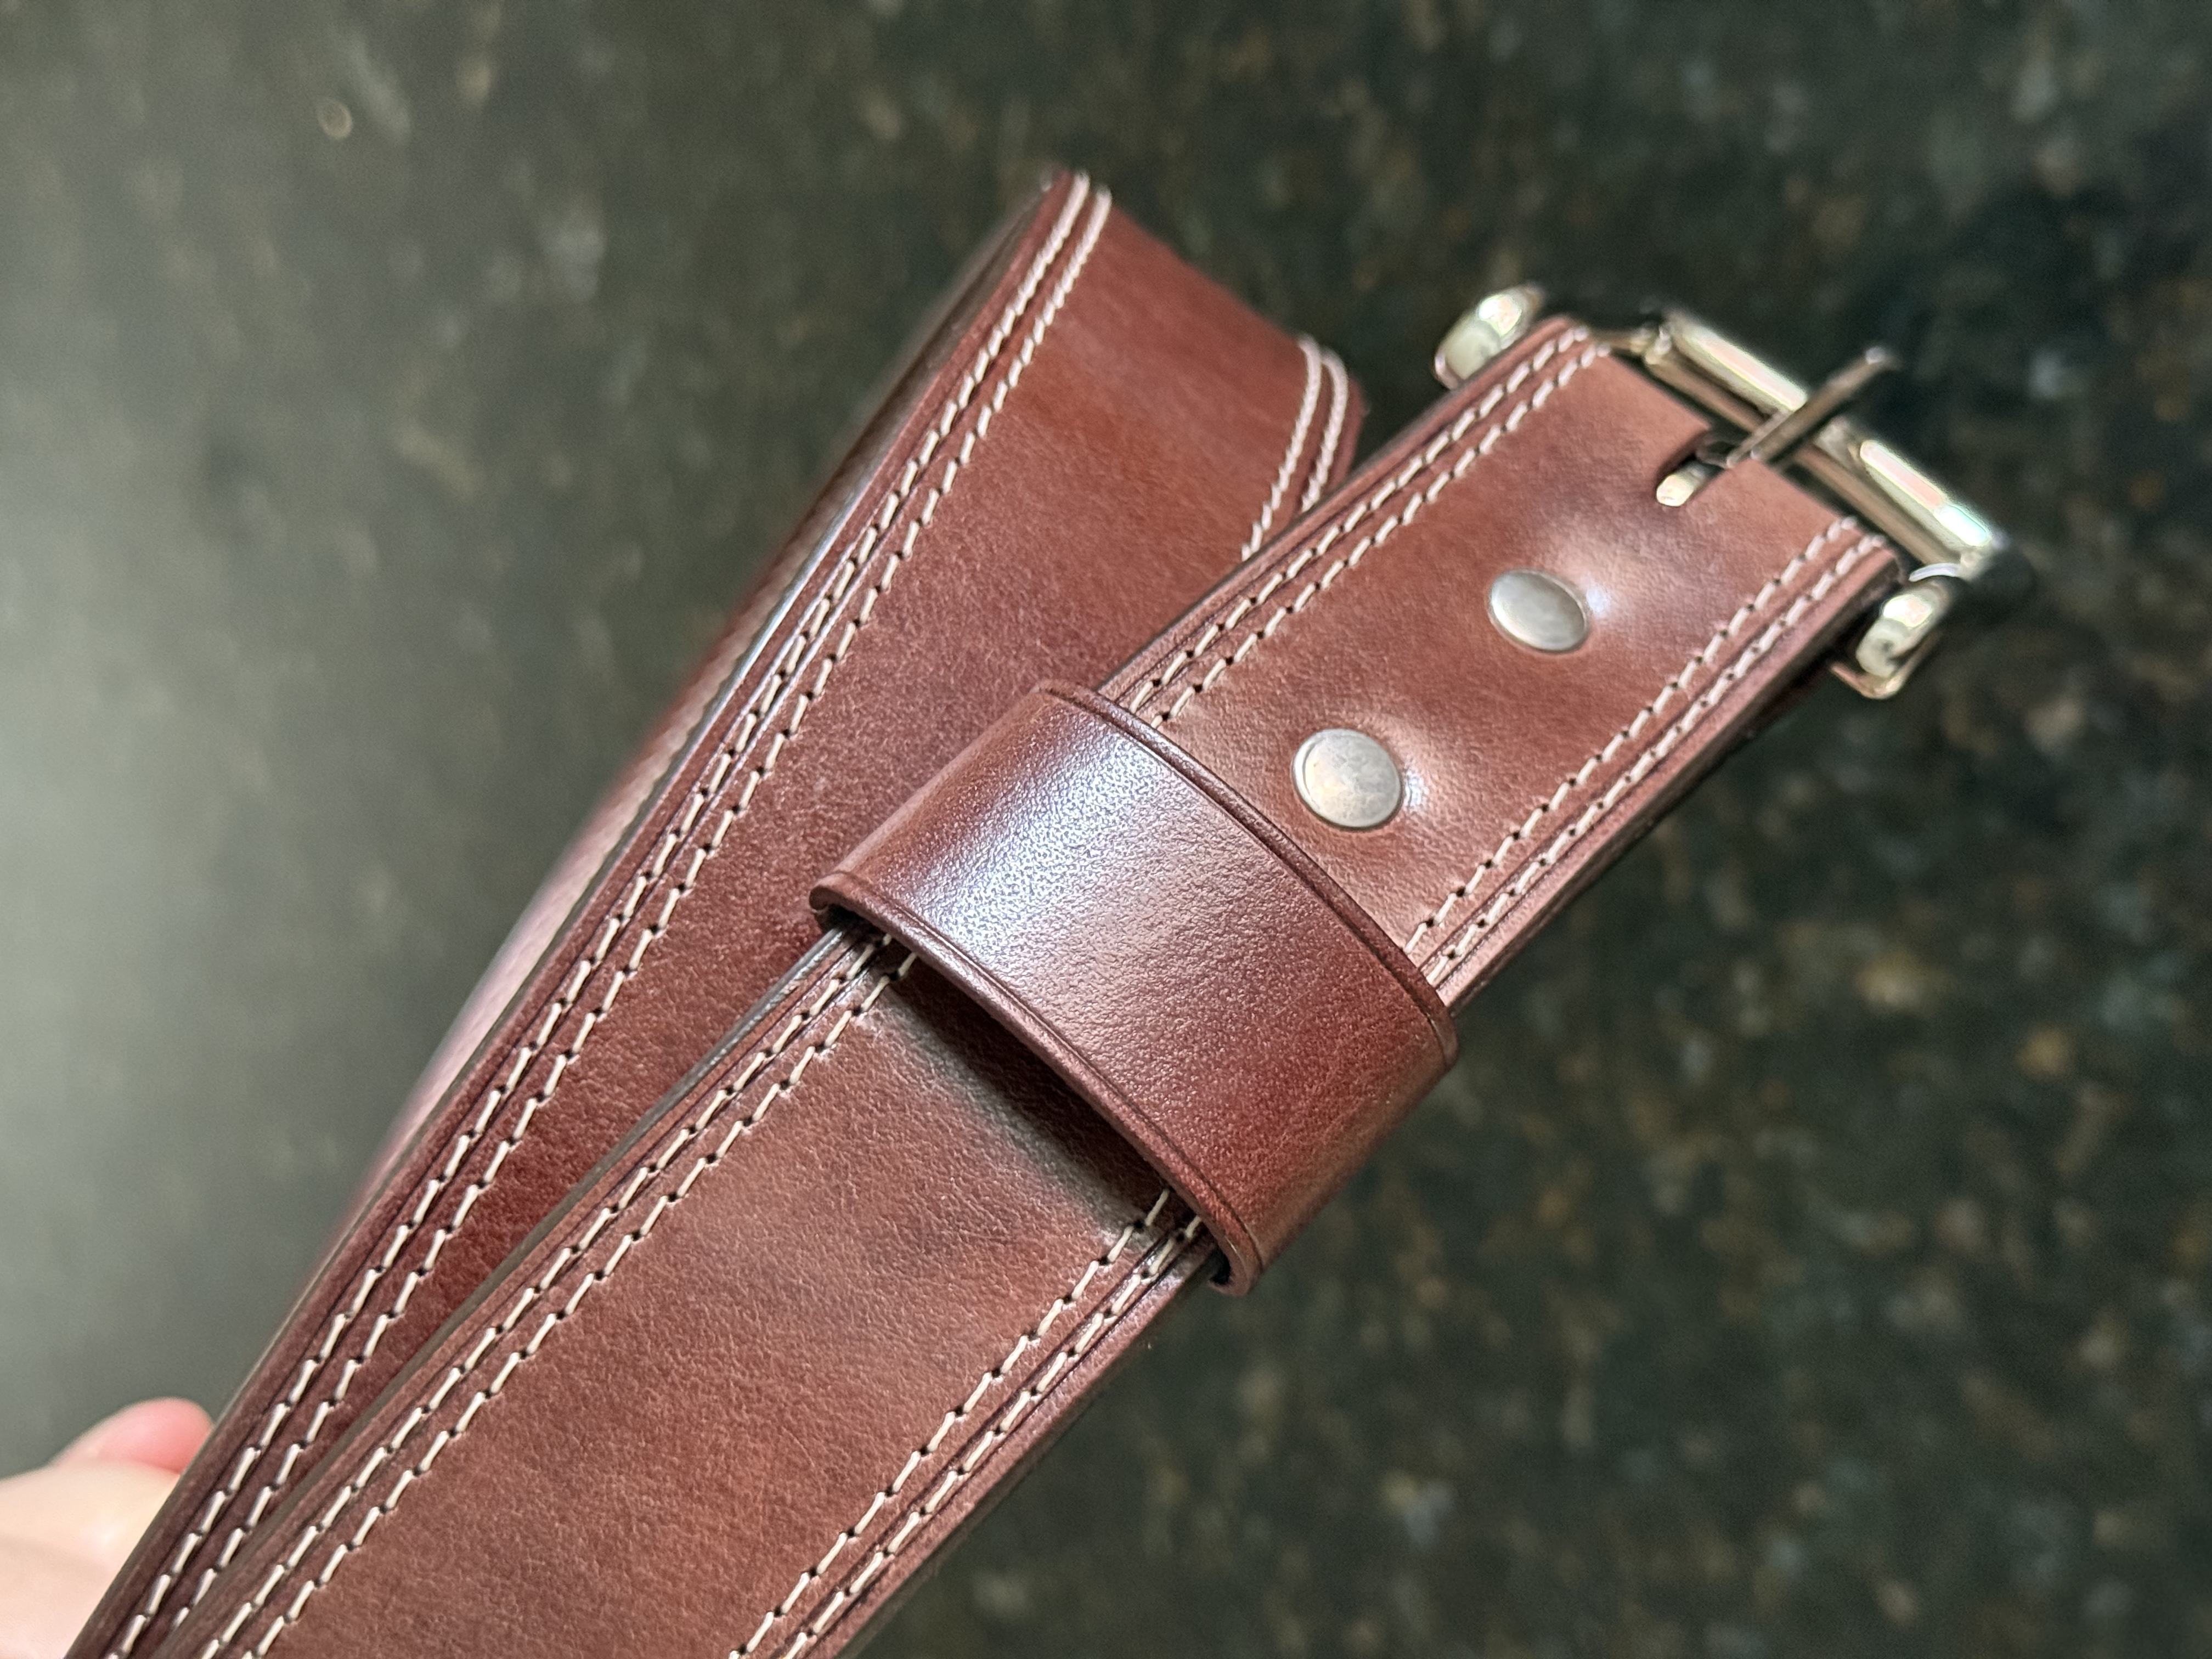
The close view shows the grain beneath that sheen, with the keeper still carrying a slightly different color from the strap. The stitching and silver-colored hardware gave those variations a clean, deliberate frame. I had thought of giving the belt away. But I think I'll keep it.
Highest Recommendation
Overall Assessment
Choosing where to cut will matter. I still want to make a small cover with the leather untreated, giving its cosmic complexion a chance to shine. The belly arrived quickly, accompanied by a handwritten thank-you note, and offered a substantial amount of leather for the price. I work with a great deal of leather and have a strong sense of how different articles lend themselves to different purposes. Maya starts as a standard belly with a surprisingly rich, sometimes broken surface character, but proceeds, almost as if by alchemy, to become a utility article with real range. It rewarded creativity in unexpected ways, and for that alone gets my highest recommendation.